Creating and Maintaining Document Records
Audience: Content Managers
There are multiple different ways of uploading documents into EQMS. Also, different documents will have different levels of control and your permissions may affect the level of access that you may have.
Standard Documents
Documents of a Standard Document Control Type do not require approval. Documents of this type are made available to all permitted users when uploaded to the system.
When
- Draft – Document Details are being completed
- Content Needed – Record created but no document attached
- Graphics Required (*) – Record created but no graphics file attached
- URL Identification (*) – Record created but URL has not been identified
- Link to Structure – Document is available in the system but has yet to be linked to the Navigational structure
- Live – Document is Live in the system and available for all permitted users via the Navigator and the Search Area.
- Checked Out (*) – The document has been ‘checked-out’ by another user. You will be prompted of which user has currently checked the document out. You should not attempt to make other amendments to the document while another user has the document checked out.
- Relink to Structure – Document is Live in the system, however the link to the structure has been removed.
- Archived – The document has been archived and is no longer available via Navigator or Search. Archived documents can be located via Document Manager | Documents | Manage Documents | Show Archived Docs
The Lifecycle for Standard Document begins: -
- define a Document record
- upload the Document file
- supply graphic(s) file(s) (if needed)
- supply hyperlink reference(s) (if needed)
- link the uploaded Document to the Navigator Tree Structure
This process is repeated for each new version of the Document in modified form:
- change the version number, and any other changed detail
- upload the revised Document file
- supply graphic(s) file(s) (if needed)
- supply hyperlink reference(s) (if needed)
- the Navigator link is already set up, and the previous version is copied into Archive (if appropriate)
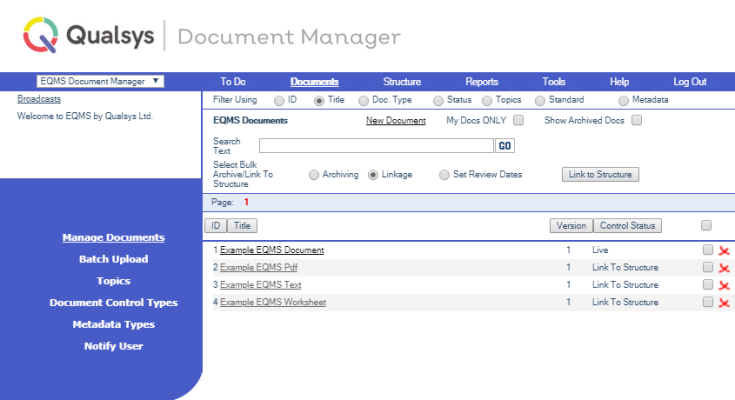
- Select EQMS Document Manager | Documents | Manage Documents. You will be presented with a similar screen to this:
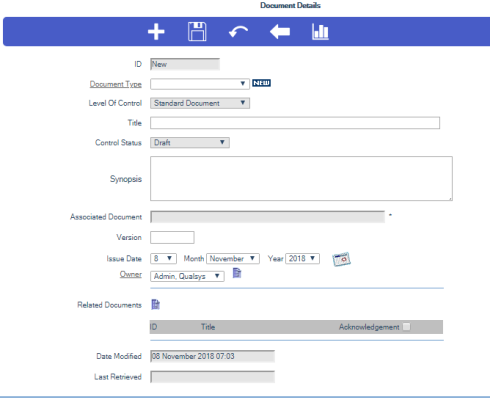
- Select New Document, located above the Title column heading. The Document Details screen is presented similar to this:
The Document Owner can be an individual User or as a Group of Users (Allow Group Ownership must be enabled in the module parameters)
Important:
The Document Owner is the EQMS User that EQMS will deliver messages to regarding the document… such as “Document Feedback” or “Document Review Reminders”. If the Document Owner is a Group of Users then all members of the Group will receive all messages about the Document.
- Complete details for your new document and select the Save icon. You will be presented with the following screen:
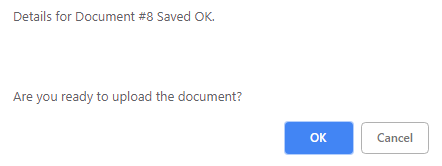
- Select OK to save the details of the document and continue or Cancel to abandon. You will be presented with the following screen:
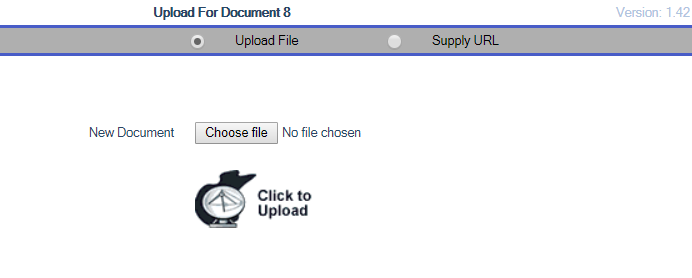
- Select OK and continue to upload a Document or web site (Cancel to perform the task at a later date). You will be presented with the following screen:
- To upload a website as a Document select the Supply URL filter in the blue menu bar and complete the URL reference in the New URL field, OR…
- To upload a document select the Upload File filter in the blue menu bar. Find your Document using the standard Browse facility and click on the Click to Upload icon (Once only). You will be presented with the Uploading File screen which will automatically close when the upload has completed
Note:
The document upload can be terminated by selecting the Stop button in your browser.
- EQMS now has a copy of your file. The details for the new live document will be displayed
the following screen will be displayed:
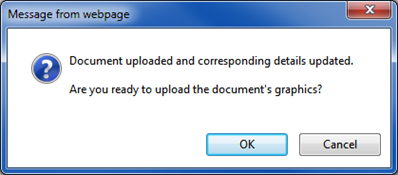
- Select OK to continue to load the Documents Graphic(s). (Cancel to perform the task at a later date).
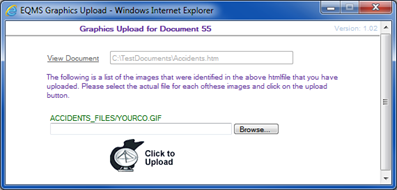
The EQMS Graphics Upload screen is displayed:
You can now search anywhere on your network for the Graphic(s) using the standard Browse facility.
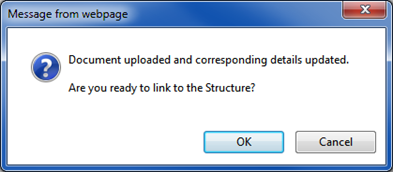
- Find the Graphic(s) and click on the Click to Upload icon. EQMS now has a copy of the Document’s Graphic. The following screen will be displayed:
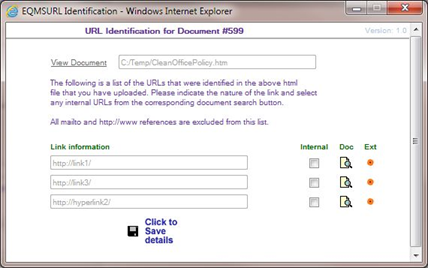
- Select OK to continue to load the Documents Hyperlink(s). (Cancel to perform the task at a later date). The EQMSURL Identification screen is displayed:
If the Hyperlink points to an External Network file or Web page, you can check the Hyperlink by selecting the Click to View icon (Ext)
- Find the EQMS Document(s) you wish to Hyperlink to, or check the External Hyperlink(s) and click on the Click to Save details icon. EQMS now has a copy of the Document’s Hyperlink(s). The following screen will be displayed:
Important:
The functionality detailed above is available via Navigator Right click and is instigated by selecting Add New Document
- Click on OK to continue (Cancel to perform the task at a later date). You will be presented with a similar screen to this:
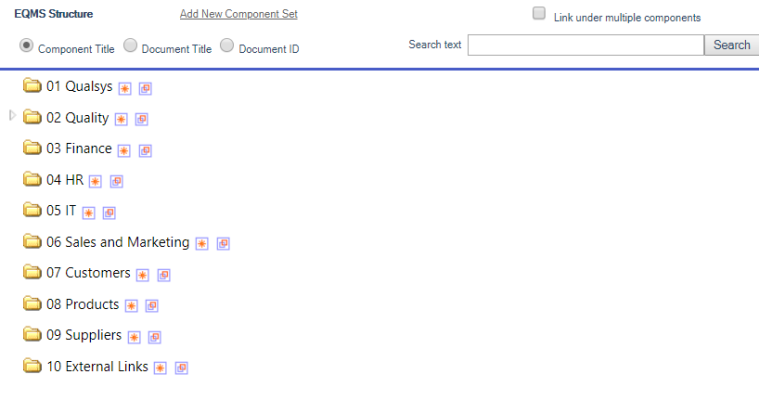
You can expand the EQMS Structure by clicking on the plus icon to the left of the Document Set titles.
The page icon denotes that there is a Document already linked to that item.
When you click on the star icon of an existing Structure Component a new Sub Component is created beneath it with the Title drawn from the Document details.
The Link to this Component icon links your new Document to that Component, displacing the Document already there if there is one.
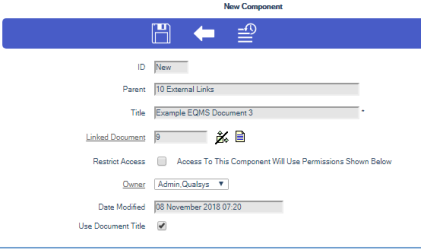
- Select a Structure component and click on the star icon. You will be presented with a similar screen to this:
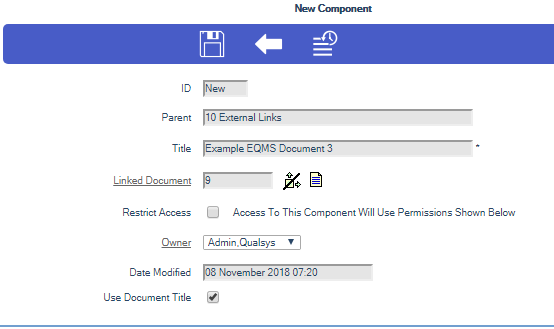
- The Component Title will be populated and is maintained from the Document title. Use Document Title check box is ticked.
- If you wish to call the New Component something different to the Document title un-tick Use Document Title. Make your changes and select the Save icon. You will be presented with the following screen:
- Select OK to Save the New Component details or Cancel to decline. The following screen will be displayed:
- Select OK to continue. The Component details screen will be displayed
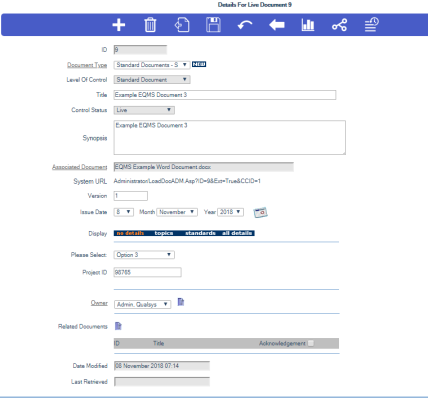
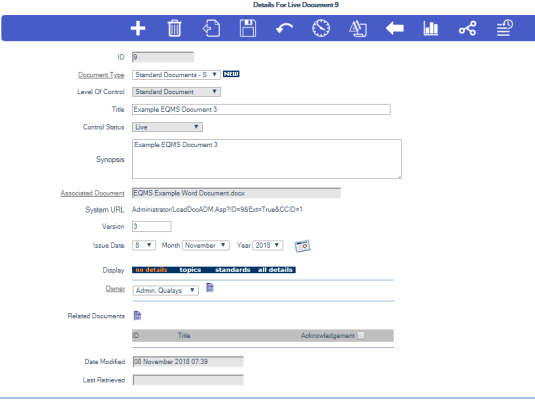
- Select the Back icon from the blue icon bar. You will be presented with the Details for Live Document screen
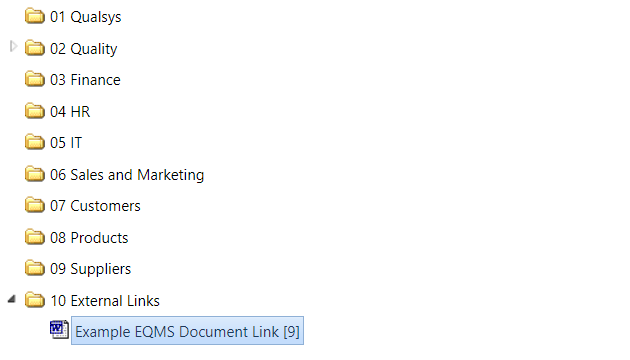
- Select the Links icon from the blue icon bar to confirm you placed the document into the correct place in the Structure. You will be presented with the EQMS Structure screen similar screen to this:
Note:
The functionality detailed above is available via Navigator Right Click by selecting Create New Component from the presented menu options.
- Select EQMS Document Manager | Documents | Manage Documents.
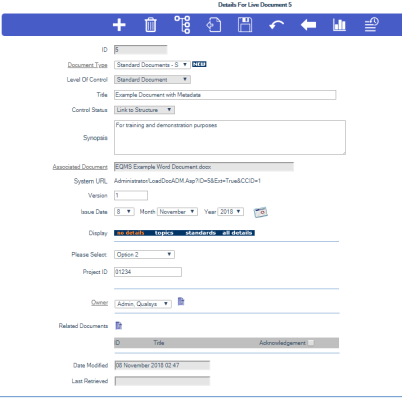
- Select a document Title from the list of EQMS Documents. You will be presented with a similar screen to this:
You can change any of the (Metadata) details associated with the new version, but the Version number must be changed to initiate the upload process for the new document.
- Change the Version and select the Save icon. The following screen will be displayed:
- Select OK to save the changes or Cancel to abandon the changes. The following screen will be displayed :
- Select OK to upload a revised Document or Cancel if the changes were to the Document Details only. The following screen will be displayed if OK is selected:
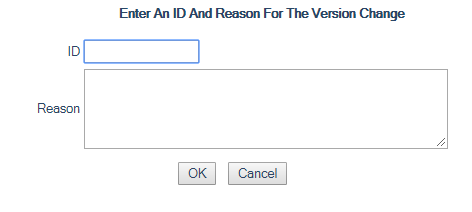
- Select OK and continue to upload the new version of the Document. If Change Logs are enabled, you will be presented with a similar screen to this:
- Enter an Identifier for the change and a reason.
- Select OK to confirm the change or Cancel to abandon
- When prompted, select OK to upload the new document version. You will be presented with a screen similar to below:
- You can now search anywhere on your network for your Document using the standard Browse facility. Find the Document and click on the Click to Upload icon (Once only). You will be presented with the Uploading File screen which will automatically close when the upload has completed
Note:
The document upload can be terminated by selecting the Stop button in your browser.
Note:
If your Document is an HTML Document containing Graphics and/or Hyperlinks, the additional stages outlined in section 3 - Creating a New Document, will have to be completed.
Important:
You will not be prompted to link the document to the structure as the Navigator Tree link was established when the first version of the Document was uploaded.
The new version of the document is now Live and the previous version has been archived. A new History icon is displayed in the blue icon bar in the Details for Live Document nnn screen. Use the History icon to display the details of previous versions.
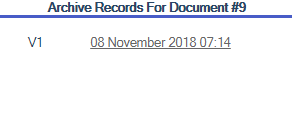
- Select the History icon from the blue icon bar. You will be presented with a similar screen to this:
- This shows a list of the previous version(s). You can view them by clicking on the hyperlink. You will be presented with the Details for Document nnn Archived (DD | Month | Year | HH:MM) screen
Note:
Any Archived details are not amendable.
Important:
The functionality detailed above is available via Navigator Right click and selecting Add New Document Version but only if you have the correct permissions.
The Check-in/Check-out functionality is activated from the Document Control Type Details screen.
Documents can be checked out to prevent additional users amending a document at the same time which can lead to duplicated or lost work. If you plan on making amendments to an existing document, it is good practice to 'Check it out' first so that other others are aware.
- Select EQMS Document Manager | Documents | Manage Documents.
- Select a document Title from the list of EQMS Document(s). You will be presented with a similar screen to this:
- Select the Check-Out icon in the blue icon bar. You will be presented with the following screen:
- Select OK or Cancel to abandon the change. The following screen will be displayed:
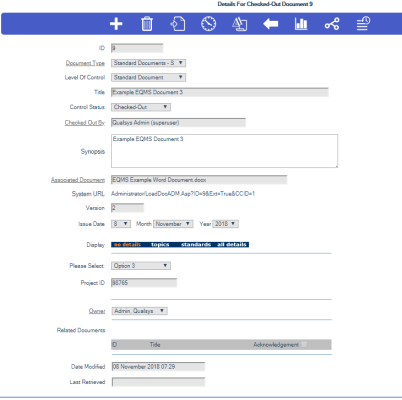
- Select OK and to continue. The Details for Checked-Out Document nnn screen is displayed with a new Control Status of Checked-Out and a new field Checked Out By displaying the User that checked the Document out.
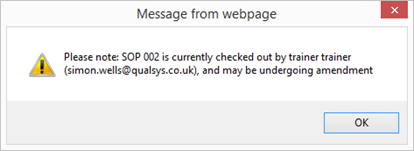
- This Document in the example above can only be Checked-in by Simon Wells or an Administrator and while it is in this Control Status no changes to the Meta data can be made. If the Document is viewed while in this Control Status the following message is displayed:
- Select OK to display the associated Document
- Select the Check-in icon from the blue icon bar in the Details for Draft Document nnn screen. The following screen will be displayed:
- Select OK to continue or Cancel to leave the Document Checked-out. The following screen will be displayed if OK is selected:
- Select OK to perform a version change or Cancel to Check-in the current document.
- Complete the Change Log Reason, alter the Version and select the Upload icon from the blue icon bar. You will be presented with a similar screen to this:
- You can now search anywhere on your network for your Document using the standard Browse facility. Find the Document and click on the Click to Upload icon (Once only).
- You will be presented with the Uploading File screen which will automatically close when the upload has completed
Note:
The document upload can be terminated by selecting the Stop button in your browser.
If your Document is an HTML Document containing Graphics and/or Hyperlinks, the additional stages outlined in - Creating a New Document, will have to be completed.
- You will be presented with the document details screen when the upload has been completed.
The new version of the document is now Live and the previous version has been archived. A new History icon is displayed in the blue icon bar in the Details for Live Document screen. Use the History icon to display the details of previous versions. If Log Changes were also requested a new Log Info icon will also be displayed. Selecting this will present the given reason for the version change and also who performed it.
Note:
You will not be prompted to link the document to the structure as the Navigator Tree link was established when the first version of the Document was uploaded.
Important:
The functionality detailed above is available via Navigator Right click and selecting Edit Document Detail and then selecting Check-Out in the blue icon bar in the presented Details for Live Document nnn screen.
A Document’s link to the structure can be removed in one of two ways.
- By severing the Document link to the Document Set or Structure Component or
- By deleting a Document Set or Structure Component.
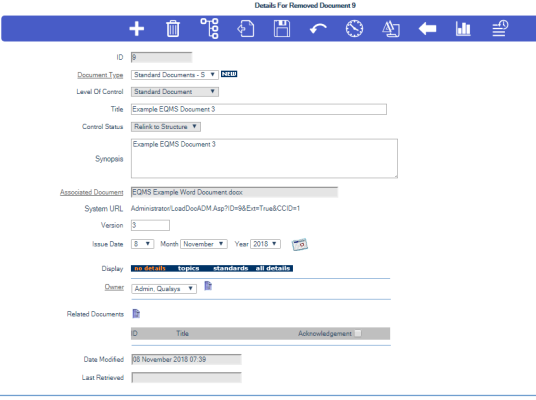
The Document will no longer be visible via the Navigator Tree component to which it was linked and will not be returned in Navigator searches. The Document will be displayed in the EQMS Documents screen with a status of Relink to Structure.
- To relink the Document back into the Navigator Tree, choose a Document with a Control Status of Relink to Structure by clicking on its Title and select the Structure icon from the blue icon bar in the Details for Removed Document nnn screen.
- Select the Structure icon from the blue icon bar. You will be presented with a similar screen to this:
You can expand the EQMS Structure by clicking on the plus icon to the left of the Document Set titles.
The page icon denotes that there is a Document already linked to that item.
When you click on the star icon of an existing Structure Component a new Sub Component is created beneath it with the Title drawn from the Document details.
The Link to this Component icon links your new Document to that Component, displacing the Document already there if there is one.
- Select a Structure component and click on the star icon. You will be presented with a similar screen to this:
- Select the Save icon.
- When prompted, select OK to save the component or Cancel to decline.
- Select OK to continue. You will be present with the Component Details screen similar to this:
- Your Document will now have a Control Status of Live and be visible through the Navigator Tree again. Select the Back icon to view the document details screen
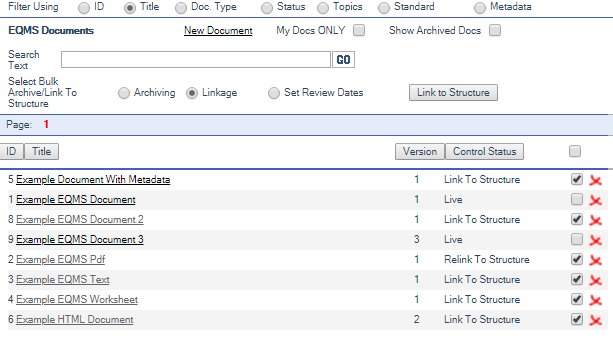
- You can also Link or Relink a Document(s) into the Navigator Tree by selecting the Linkage radio button on the Documents list screen. This allows you to link an individual document, many or all documents on the presented page into the Navigator Tree. Select the Document(s) you wish to link by ticking the check box to the right of each document record as shown below:
- Once you have chosen your documents select the Link to Structure button located in the search area of the screen above the Title column. Follow the same process as you did when linking the Document originally. Your selected Document(s) will all be linked under your chosen Structure Component and will now have a Control Status of Live and be visible through the Navigator Tree again.
- To select all of the documents on a presented page tick the check box to the right of the Control Status column heading
- Select the Link to Structure button located in the search area of the screen above the Title column. Follow the same process as you did when linking the Document originally. The selected Documents will be linked under the chosen Structure Component. Those documents with a Control Status of Link or Relink to Structure will now be Live and those documents that had a Control Status of Live will have multiple links in the structure
Important:
The functionality detailed above is available via Navigator Right click and selecting Link An Existing Document from the menu.
You may need to update or modify a Document’s Metadata even though the Document itself has not changed. The Details for Live Document # screen will contain the metadata fields of the Document Control Type at its creation. To modify Metadata fields: -
- Select EQMS Document Manager | Documents | Manage Documents, filter by Doc. Type and select a Document Control Type with metadata associations. Click on the required Document Title. You will be presented with a similar screen to this:
Any or all of the Metadata fields may be modified, and the Details Saved.
- Modify the metadata entries, and select the Save icon.
- Select Cancel when asked “Do you also want to upload a revised Document?”
Validation will be applied to all the metadata entries which are mandatory (*) or which have predefined range limits.
If the system has the Archive Meta Data Change setting checked (switched on), then the system will keep archived copies of the Document with its metadata prior to the change.
Controlled Documents
Documents of a Controlled Document Control Type must be approved via a predefined approval path before becoming ‘live’ on the system.
When
- Draft – Document Details are being completed
- Content Needed – Record created but no document attached
- Graphics Required (*) – Record created but no graphics file attached
- URL Identification (*) – Record created but URL has not been identified
-
Awaiting Approval – Document is undergoing an approval process
- Link to Structure – Document is available in the system but has yet to be linked to the Navigational structure
- Live – Document is Live in the system and available for all permitted users via the Navigator and the Search Area.
- Checked Out (*) – The document has been ‘checked-out’ by another user. You will be prompted of which user has currently checked the document out. You should not attempt to make other amendments to the document while another user has the document checked out.
- Relink to Structure – Document is Live in the system, however the link to the structure has been removed.
- Archived – The document has been archived and is no longer available via Navigator or Search. Archived documents can be located via Document Manager | Documents | Manage Documents | Show Archived Docs
The Lifecycle for Controlled Document begins: -
- define a Document record
- upload the Document file
- supply graphic(s) file(s) (if needed)
- supply hyperlink reference(s) (if needed)
- complete the Actions fired off by the Request for Change (if Apply Control to New Docs has been enforced)
- link the uploaded Document to the Navigator Tree Structure
This process is repeated for each new version of the Document in modified form:
- change the version number, and any other changed detail
- upload the revised Document file
- supply graphic(s) file(s) (if needed)
- supply hyperlink reference(s) (if needed)
-
complete the Actions fired off by the Request for Change
- the Navigator link is already set up, and the previous version is copied into Archive (if appropriate)
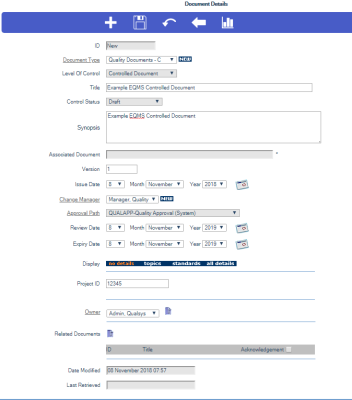
- Select EQMS Document Manager | Documents | Manage Documents and select New Document, located above the Title column heading. Select your Controlled Document Control Type from the Document Type drop down list. You will be presented with the Document Details screen similar to this:
You will be provided with the Level of Control (unchangeable), Change Manager, Approval Path (unchangeable if enforced) and Notification Group(s) from the Document Control Type template, default Issue Date of today, and yourself as the Owner. You can now populate this record with Title, Synopsis, Version number, Topics, Org Areas and Standards (If available).
The Document Owner can be an individual User or a Group of Users. (Allow Group Ownership must be enabled in the Module Parameters to enable group ownership)
Important:
The Document Owner is the EQMS User that the system will deliver messages to regarding the document… such as Document Feedback or Document Review Reminders. If the Document Owner is a Group of Users then all members of the selected Group will receive all messages about the Document.
- Complete the required fields and select the Save icon. You will be presented with an overlaid dialogue screen similar to this:
- Select OK to Save the Document Details or Cancel to reject. You will be presented with an overlaid dialogue screen similar to this:
- Select OK to upload your Document or Cancel to continue the upload later. If OK, you will be presented with an overlaid dialogue screen similar to this:
You can now search anywhere on your network for your Document using the standard Browse facility.
- Find a Document and select the Click to Upload icon.
Your Document is now loaded into the EQMS but is in Awaiting Approval status until it has passed through all the necessary Approval Path Actions.
The approval process can be managed via the associated RFC. The Approval Path Actions are issued automatically into the specified recipients To Do List in the defined sequence.
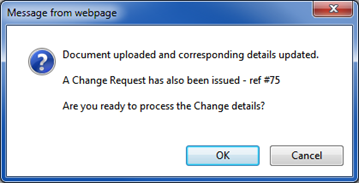
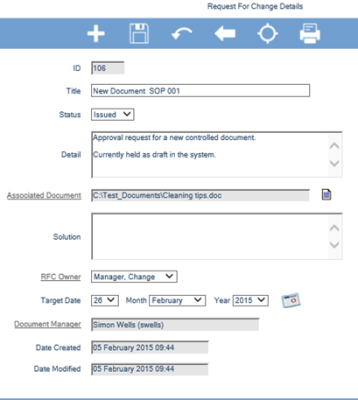
- Select OK to view the details of the associated RFC or Cancel to reject. You will be presented with the Request For Change Details screen similar to this:
- To view the associated Actions and their status select the Actions icon. You will be presented with the Action List screen similar to this:
- Depending on your system access you can manage the RFC by selecting an Action to display its details. The Owner(s) of the issued Approval Path Action(s) will receive an incoming request in their To Do List.
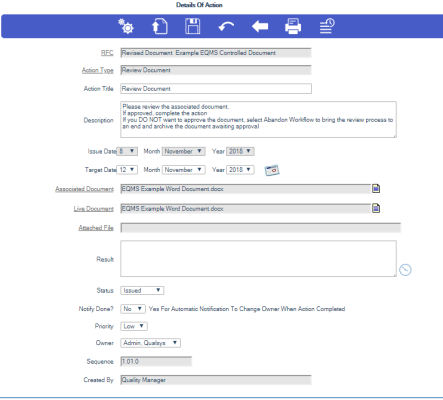
- To view the Action details click on its Details. You will be presented with the Details of Action screen similar to this:
In the example above the Actionee must enter their comments in the Result field and select the Save icon. You will be presented with an overlaid dialogue screen similar to this:
- Select OK if you want the Status to be automatically populated with Complete. The Action will be removed from your To Do List. This will trigger the next Action in the Approval Path sequence to be released into the recipients To Do List.
- Select Cancel to leave the Action in your To Do list.
- Select OK to save the details you typed in the Result field or Cancel to reject.
Note:
The Change Manager can monitor and control the progress of RFC’s by viewing the RFC List or by using the Reporting tools. The Change Manager has the power to override and complete Actions in an emergency.
- Select EQMS Change Manager | Changes | Request for Change. You will be presented with a similar screen to this:
- Use the filters to produce a list of specific RFC’s and choose an RFC by clicking on the Title in the RFC List screen and view the associated Actions by clicking on the Actions icon. You will be presented with the Action List screen similar to this:
- Select an Action from the supplied list to view its details. You will be presented with the Details Of Action screen similar to this:
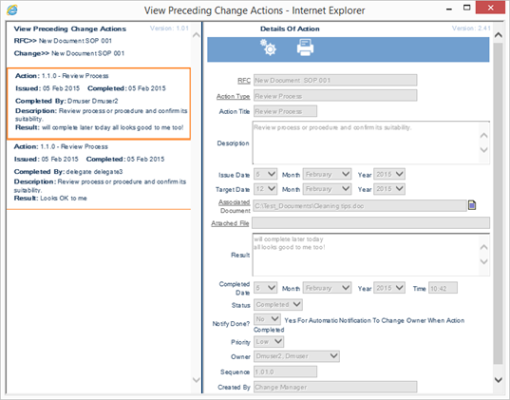
- Select the History icon to view the previous Actionees comments: You will be presented with the View Preceding Change Actions screen similar to this:
- When all of the Approval Path actions have been completed the Document Owner, providing they have permission, should link the Document into the structure for Navigator users to view. Failing this, a Document Manager should link the Document into the Structure.
Important:
The functionality detailed above is available via Navigator Right click and selecting Add New Document. When using this option to upload a document the structure link is created automatically once the document is issued.
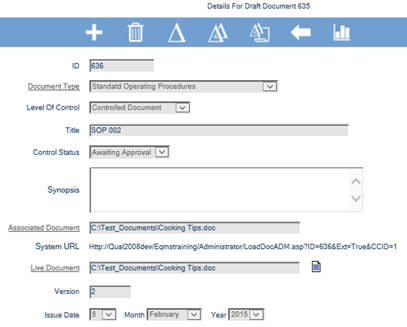
- Select EQMS Document Manager | Documents | Manage Documents and select New Document, located above the Title column heading. Select your Controlled Document Control Type from the Document Control Type dropdown box. You will be presented with the Document Details screen similar to this:
You will be provided with the Level of Control (unchangeable), Change Manager, Approval Path (unchangeable if enforced) and Notification Group(s) from the Document Control Type template, default Issue Date of today, and yourself as Owner. You can now populate this record with Title, Synopsis, Version number, Topics, Org Areas and Standards (If available).
The Document Owner can be an individual User or a Group of Users. (Allow Group Ownership must have been enabled in the Module Parameters to enable Group Ownership)
Important:
The Document Owner is the EQMS User(s) that the system will deliver messages to regarding the document… such as Document Feedback or Document Review Reminders. If the Document Owner is a Group of Users then all members of the Group will receive all messages about the Document.
- Complete the required fields and select the Save icon. You will be presented with an overlaid dialogue screen similar to this:
- Select OK to Save the Document Details or Cancel to reject. You will be presented with an overlaid dialogue screen similar to this:
- Select OK to upload your Document or Cancel to continue the upload later. You will be presented with the Upload for Document nn screen similar to this:
You can now search anywhere on your network for your Document using the standard Browse facility.
- Find a Document and select the Click to Upload icon. You will be presented with the following overlaid dialogue screen when the upload has been completed.
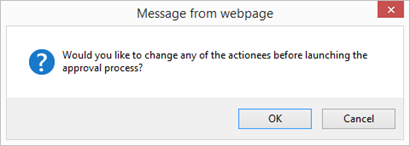
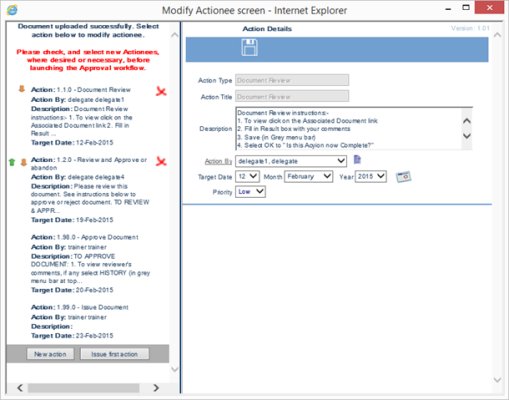
- Select OK to alter the Actionee(s) within the associated Approval Path or Cancel to make no changes to the default Approval Path Actions. You will be presented with the Modify Actionee Screen similar to this:
Note:
If any of the Actionee’s are to be selected from a Group the Modify Actionee screen will automatically be presented.
- You may alter the Action By from the either the drop down list or by selecting the User Selection List icon to the right of the field. After making a choice select the Save icon.
- You may re-sequence the Actions by selecting the upward and downward arrows to the left of the individual Actions or include an additional Action by selecting the New Action button located towards the bottom of the Action list screen in the blue bar. To remove an Action from the Approval Process select the red X to the right of the Action details
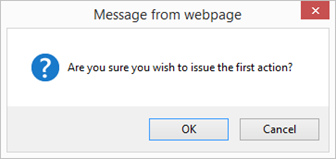
- Once you have completed all of the required changes select the Issue first action button located towards the bottom of the list of Actions in the blue bar. You will be presented with the following screen:
- Select OK to issue the first action for Cancel to make further changes.
- The approval process can be managed via the associated RFC. Approval Path Actions are issued automatically into the specified recipients To Do List in the correct sequence.
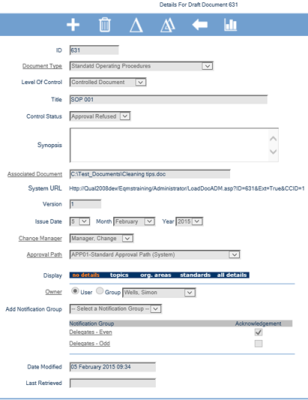
- To view the details of the associated RFC select the Change icon in the Details For Draft Document screen. You will be presented with the Request For Change Details screen similar to this
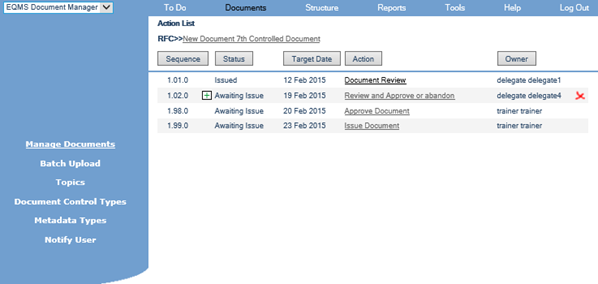
- To view the associated Actions and their status select the Actions icon. You will be presented with the Action List screen similar to this:
- Depending on your system access, you can manage the RFC by clicking on an Action to display its details.
The Owner (Actionee) of the issued Approval Path Action will receive an incoming request(s) in their To Do List.
Each Action Owner must complete their task. When the Issue Document Action is completed a Notification message will be sent to the Document Owner. Providing they have permission they should link the Document into the structure for Navigator users to view. Failing this, a Document Manager should link the Document into the Structure.
Note:
The Change Manager can monitor and control the progress of RFC’s by viewing the RFC List or by using the Reporting tools. The Change Manager has the power to override and complete Actions in an emergency.
- Select EQMS Change Manager | Changes | Request for Change. You will be presented with a similar screen to this:
- Use the filters to produce a list of specific RFC’s and choose an RFC by clicking on the Title in the RFC List screen and view the associated Actions by clicking on the Actions button in the blue menu bar. You will be presented with a similar screen to this:
- Select an Action from the supplied list to view its details. You will be presented with a similar screen to this:
Important:
The functionality detailed above is available via Navigator Right click by selecting Add New Document. When using this option to upload a document the structure link is created automatically once the document has been approved.
The Document Approval can be refused in one of two ways:
- Select EQMS Change Manager | Changes | Requests for Change. Filter by Document, RFC Status All and select Pending from the Approval Status drop down list. You will be presented with a similar screen to this:
- Select the Title of the RFC you want to look into. You will be presented with the Request For Change Details screen similar to this:
- Select the Actions icon. You will be presented with the Action List screen similar to this:
- Select the Approve Document Action. You will be presented with the Details of Action screen:
- Complete the Result field, choose No from the Approved? dropdown box and select the Save icon. You will be presented with an overlaid dialogue screen similar to this:
- Select OK to continue or Cancel to leave the Action Status as Issued to complete later.
- The Request for Change is abandoned at that point. Both the Change Manager and the Document Owner will get a Notification in their To Do list informing them that vn of Document nnn Not Approved. Within the Documents Details the Control Status will now say Approval Refused. The document upload or version change must be performed again once any amendments have been made to the Draft Document.
- Selecting the Print icon will generate a Summary report detailing why the document Approval has been refused
- Additional Document Approvers can be used by altering Action Type variable parameters.
- If parameter Abandon Change Path is set to True (Ticked) there will be an Abandon icon available to the Actionee in the blue icon bar.
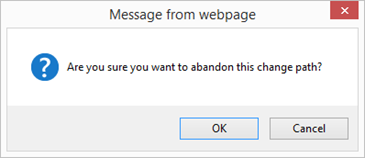
- Select the Abandon icon. You will be presented with an overlaid dialogue screen similar to this:
- Select OK to continue or Cancel to reject. You will be presented with an overlaid dialogue screen similar to this:
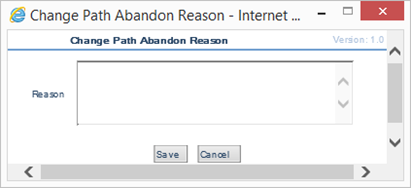
- Complete the Reason and select the Save button to abandon the change or Cancel to reject
- The Request for Change is abandoned at that point. Both the Change Manager and the Document Owner will get a Notification in their To Do list informing them that vn of Document nnn Not Approved. They will also get an Email if their settings dictate this. Within the Documents Details the Control Status will now say Approval Refused. The document upload or version change must be performed again once the necessary amendments have been made to the Draft Document.
The Check-in/Check-out functionality is activated from the Document Control Type Details screen.
- Select EQMS Document Manager | Documents | Manage Documents. Filter by Document Control Type and select one from the drop down list. You will be presented with a similar screen to this:
- Select a document Title from the list of EQMS Documents. You will be presented with a similar screen to this:
- Select the Check-Out icon. You will be presented with an overlaid dialogue screen similar to this:
- Select OK to check the document out or Cancel to reject. You will be presented with an overlaid dialogue screen similar to this:
- Select OK and to continue.
- The Details for Checked-Out Document nnn screen is displayed with a new Control Status of Checked-Out and a new field Checked-Out By displaying the User that that Checked-out the Document.
- This Document can only be Checked-in by Trainer or an Administrator and while it is in this Control Status no changes to the Metadata can be made. If the Document is viewed while in this Control Status the following message is displayed:
- Select OK to display the associated Document
- Select the Check-in icon in the Details for Checked-Out Document nnn screen. You will be presented with an overlaid dialogue screen similar to this:
- Select OK to continue or Cancel to reject leaving the Document Checked-out. You will be presented with an overlaid dialogue screen similar to this:
- Select Cancel to Check-In the current document.
- Select OK to continue.
- Select OK and you will be presented with the Details for Checked-Out Document nnn screen similar to this:
- Complete the Change Log Reason, alter the Version and select the Upload icon. You will be presented with the Upload for Document nn screen similar to this:
- You can now search anywhere on your network for your Document using the standard Browse facility. Find the Document and click on the Click to Upload icon (Once only).
- You will be presented with the Uploading File screen which will automatically close when the upload has completed
If your Document is an HTML Document containing Graphics and/or Hyperlinks, the additional stages outlined in section - Creating a New Document, will have to be completed.
- Select OK to continue
You are presented with the Detail For Draft Document nn screen similar screen to this:
Batch Upload
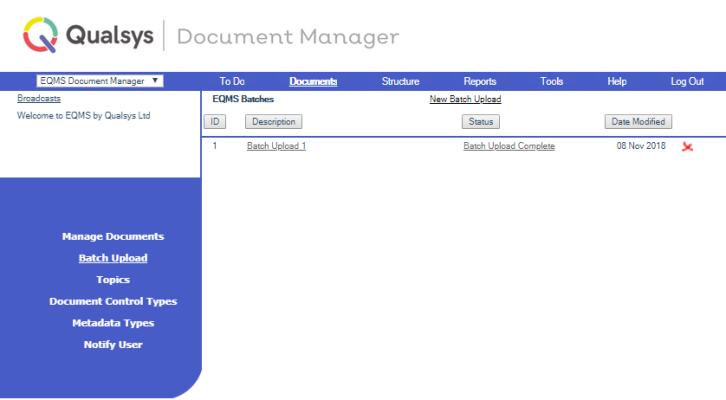
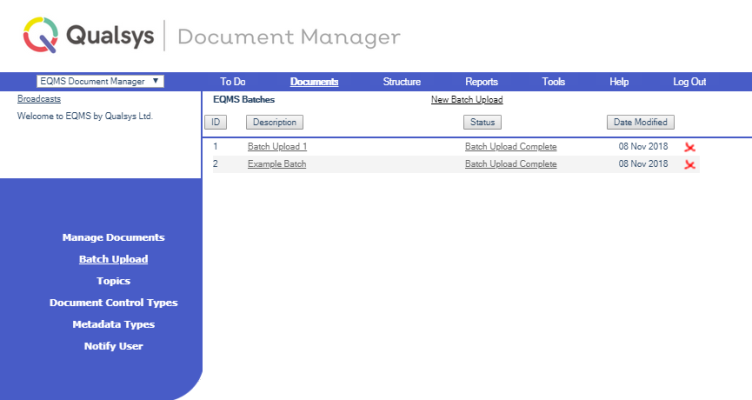
Batch Uploads can be instigated in two ways. Either via EQMS Document Manager | Documents | Batch Upload or by Right-Clicking a component in the Navigation Structure and selecting Batch Upload.
- If you select EQMS Document Manager | Documents | Batch Upload. You will be presented with a similar screen to this:
You can select the Delete icon (X) to delete a Batch Upload. If the Status of the Batch Upload is “Batch Upload Completed”, the details for that Batch upload will be removed from the system. Its Documents are under EQMS control. If you delete a Batch Upload during any other Status setting, the Batch Upload will be abandoned and its Documents will not be loaded into EQMS.
Each Batch Upload will pass through a number of Status’s before the Documents successfully transfer into the selected Document Type. These are as follows:
- Documents Uploaded – A Copy of the selected Documents has been transferred into the Batch Upload function. To continue with the Batch Upload select the Next button from the blue menu bar in the EQMS Batch Upload # screen
- Options Stored – The Documents ID’s have been created. To continue with the Batch Upload select the Next button from the blue menu bar in the EQMS Batch Upload # screen
- HTML Documents Scanned – HTML Documents within the Batch Upload have been identified. To continue with the Batch Upload select the Next button from the blue menu bar in the EQMS Batch Upload # screen
- Batch Upload Completed – The Documents are now under EQMS control. HTML documents may be in a Control Status of Graphics Required or URL Identification. These items will need supplying before the document(s) can be linked into the structure. The remaining Documents’ Control Status will already be Link to Structure.
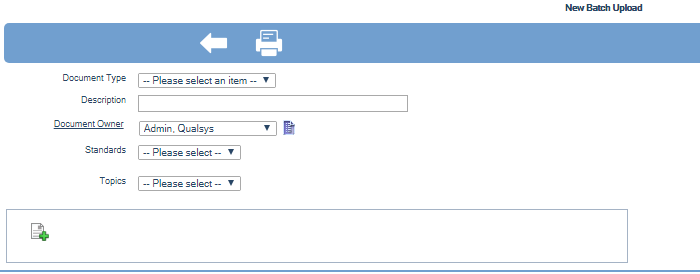
- Select New Batch Upload, located above the Description column heading. The New Batch Upload screen is displayed similar to this:
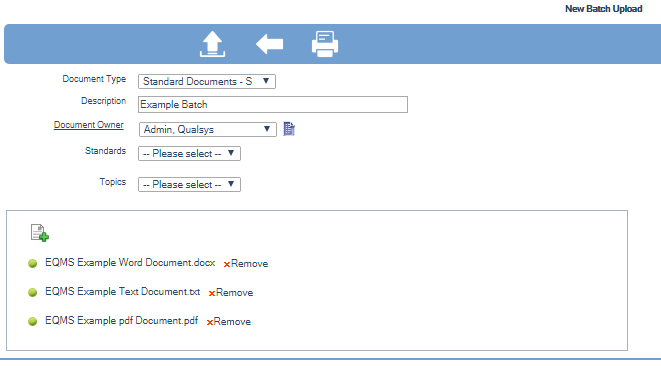
- Choose the required Document Control Type from the dropdown box, complete the Description field, select the Document Owner, assign any Organisational Areas, Standards or Topics and select the File Upload icon
 located bottom left in the lower section of the screen. You will be presented with a similar screen to this:
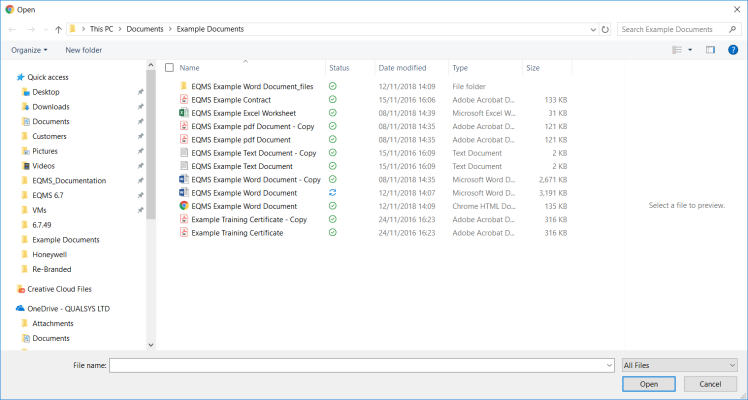
You can now search anywhere on your network for your Documents using the standard Browse facility.
- Locate your Documents, highlight them and click on the Open button. The New Batch Upload screen is presented, uploading your Document selection similar to this:
- When your selected documents have been gathered into the Batch Upload the icons to the left of the Document title go green.
- If you have selected any incorrect files, they can be removed from the Batch Upload by selecting the Remove icon to the right of the document title.
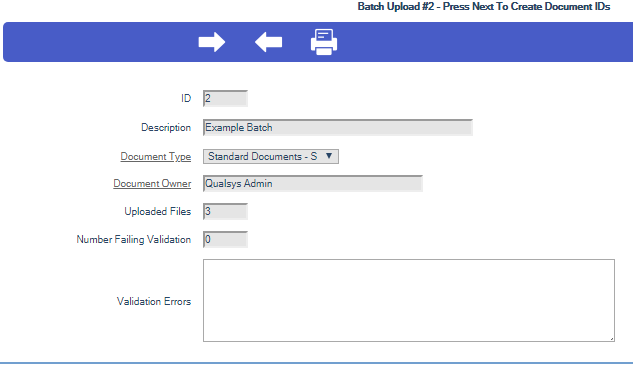
- Continue with the Batch Upload by selecting the Upload icon. If Document Manager Module Parameter Use Org ID is set to False you will be presented with a similar screen to this:
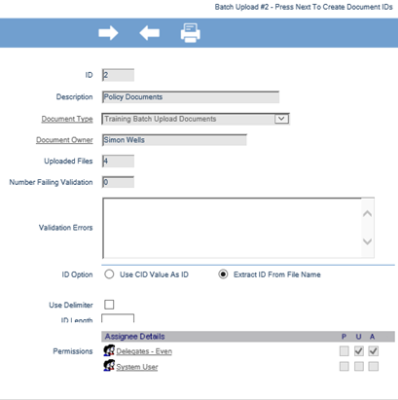
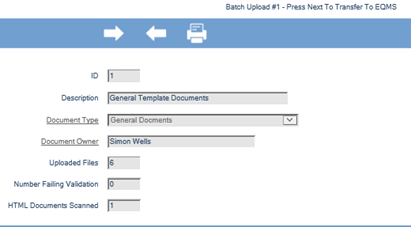
Within the Batch Upload # screen you are notified of the number of Uploaded Files and the Number Failing Validation. The files failing validation are listed in the Validation Errors field.
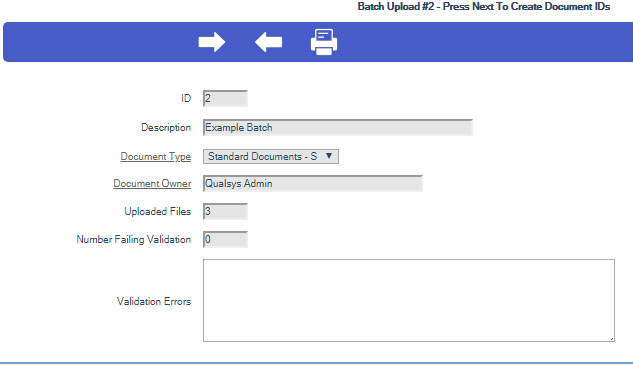
- If Document Manager Module Parameter Use Org ID is set to True and the selected Document Control Type has Document Access Restrictions in place you will be presented with a similar screen to this:
Within the Batch Upload # screen you are notified of the number of Uploaded Files and the Number Failing Validation. The files failing validation are listed in the Validation Errors field.
- You can now select how the Document ID’s within the Batch Upload are constructed once uploaded into EQMS. You can select either: -
- Use CID value as ID. The CID is a unique sequential number EQMS applies to all uploaded Documents
- Extract ID from File Name.
- If ‘a’ is the preferred method, select Use CID value as ID by selecting the radio button and proceed from item 15.
- If ‘b’ is the preferred method, select Extract ID from File Name by selecting the radio button.
The Batch Upload # screen will expand as shown below:
- You can select the length of the ID (in characters) you want to take from the Uploaded Documents File name by completing the ID Length field with that figure, as shown below:
- If you wish to construct the Document ID’s from the Document File name up to a defined delimiter, choose Use Delimiter by selecting the check box and complete the Delimiter String field, as shown below:
- If Document Manager Module Parameter Use Org ID is set to False you will be presented with a similar screen to this:
- If Document Manager Module Parameter Use Org ID is set to False and the selected Document Control Type has Document Access Restrictions in place you will be presented with a similar screen to this:
Within the EQMS Batch Upload # screen you are notified of the number of Uploaded Files and the Number Failing Validation. The files failing validation are listed in the Validation Errors field.
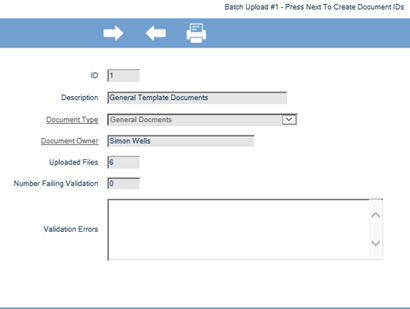
- To continue with the Batch Upload – To Create Document IDs select the Next icon from the blue icon bar. You will be presented with a similar screen to this:
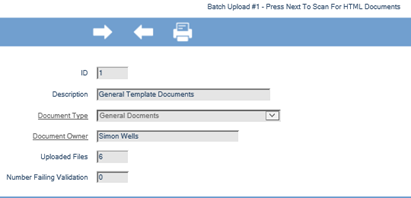
- Select the Next icon to Scan for HTML Documents. You will be presented with a similar screen to this:
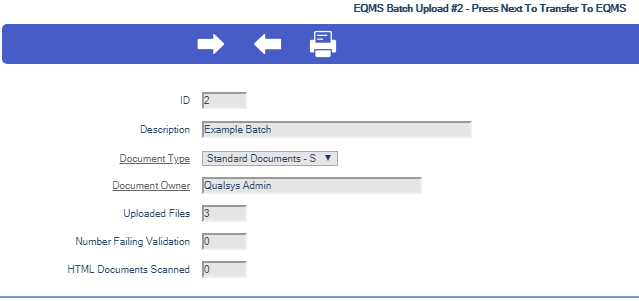
- Select the Next icon to Transfer to EQMS. This transfers your batch of Documents into the selected Document Control Type and under EQMS control. You will be presented with a similar screen to this:
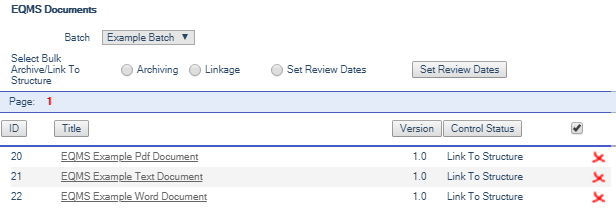
HTML documents containing Hyperlinks or Graphics need completing in the normal way. Once the Graphics and Hyperlinks have been identified and supplied their Control Status setting will change to Link to Structure.
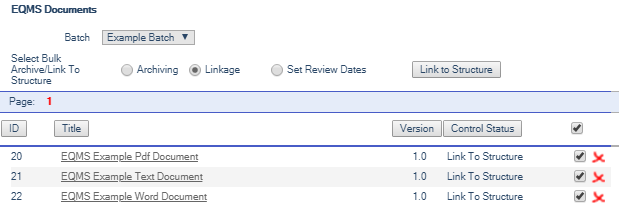
- It is possible to link all Documents to the Structure, with a Status of Link to Structure, by selecting the Linkage radio button and the Select All check box to the right of the Control Status column heading. You will be presented with a similar screen to this:
- Alternatively, Documents may be linked selectively by ticking the individual check boxes to the far right of each Document record.
- Click the check boxes of the Documents you want to link to the structure and select the Link to Structure button. The following screen will be displayed:
- Select OK to create the links or Cancel to reject. You will be presented with a similar screen to this:
- To link the documents under a Component Set select the Create New Structure Components icon to the right of the Component Set title or expand the tree by selecting the Expand icon to the left of the Component Set to locate the component you want the documents to appear under and select the Create New Structure Components icon to the right of the component title. You will be presented with an overlaid dialogue screen similar to this:
- Select OK to apply the same permissions to the new components that have been applied to the Documents or select Cancel to reject. You will be presented with a similar screen to this:
- HTML documents containing Hyperlinks or Graphics need completing in the normal way. Once the Graphics and Hyperlinks have been identified they will need linking into the structure before their control status alters to change to Live and they will appear in the Navigation Tree.
