Search is based on keyword.
Ex: "Metadata"
Do not search with natural language
Ex: "How do I create a new metadata type?"
Leave Feedback
Supplier Types
Audience: Supplier Administrators, Supplier Managers*
Supplier Types are mandatory for the creation of Supplier records. The ability to create Supplier Types is restricted to members of the Supplier Administrator Group (SUPADM). *Members of the Supplier Manager Group (SUPMGR) may be given ownership of a Supplier Type which allows them to maintain its detail.
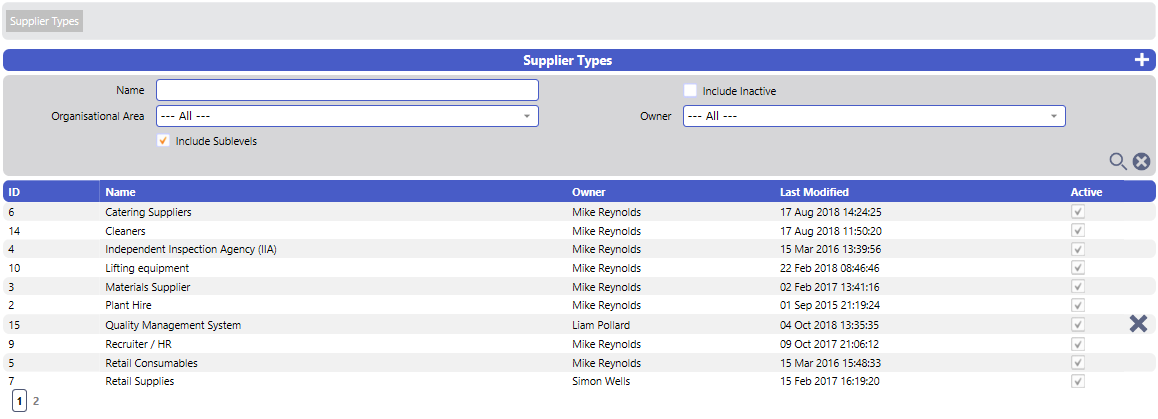
- Selection of Supplier Manager | Supplier Manager | Supplier Types will present the Supplier Types filter and list screen similar to this:
- Select the New Supplier Type icon located to the right of the Supplier Types header bar. The New Supplier Types screen will be displayed similar to this:
![]()
- Complete the mandatory Name and Description fields.
-
If you want to allow the ability to schedule the initial review for a specific date, check the Allow Schedule of Initial Reviews checkbox
-
To set a repeat schedule, check the Repeat checkbox
Note:
Additional information for setting and scheduling review methods can be found in the following sections of the guide
- Select the Save icon located to the right of the New Supplier Type header bar. The following overlaid screen will be displayed confirming that the record has been saved successfully:

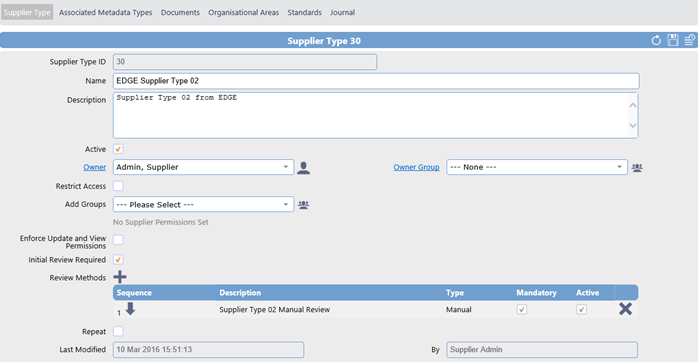
- Select OK to continue. The Supplier Type nn (ID) screen will be displayed similar to this:
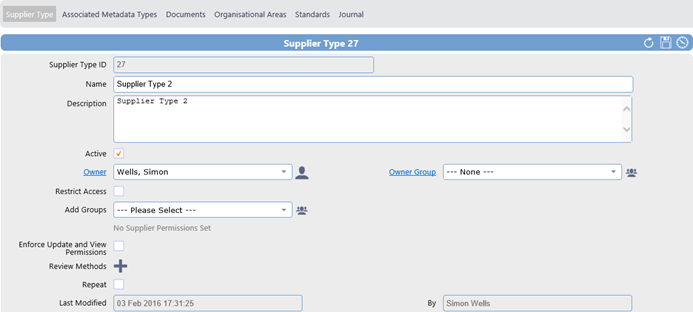
Default permissions can be applied to all Suppliers of this Type:
- Selection of EQMS Supplier Manager | Supplier Manager | Supplier Types and choose the Supplier Type you want to amend by selecting anywhere in the record row will display the Supplier Type nn screen similar to this:

- Tick the Restrict Access check box and select the Groups of users from the Add Groups dropdown box that you want to have viewing permissions to suppliers of this Type:
- Or…select the Add Supplier Permission Group icon to choose the required Groups from the Group Selection list:
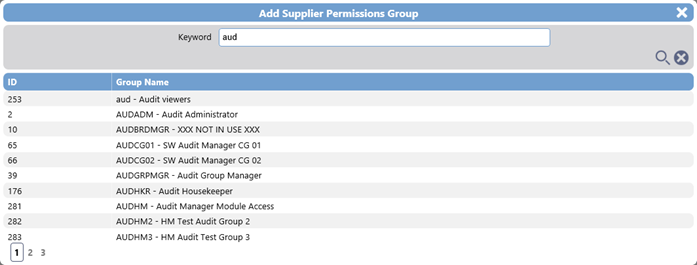
- Insert keyword strings to find the Groups you want to include in the Permissions set.
- Select anywhere in the required groups record row to inset the group into the permission set.
-
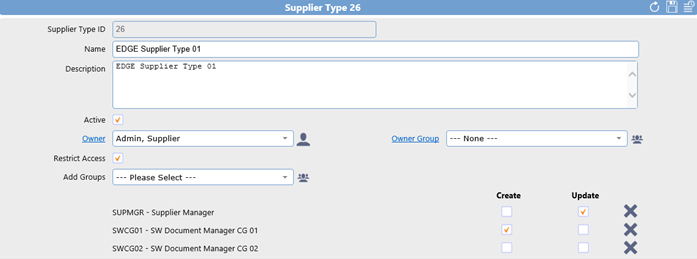
The Supplier Type nn screen will be updated similar to this:
-
Tick the Create checkbox if you want members of the group that are also members of SUPMGR to be able to create Suppliers of this Type.
-
Tick the Update check box if you want members of the group that are also members of SUPMGR to be able to maintain Suppliers of this Type.
Note:
Ticking the Enforce Update and View Permissions check box will set these permissions across existing and new Suppliers of this type.
-
Select the Save icon from the Supplier Type header bar. The following overlaid message screen will be displayed:
-
Select OK to continue.
-
When permissions are setup in this manner the default permission groups set in the Supplier Type record are applied to all new Suppliers of that type but can but altered by the record creator.

The Review Method defines how the Supplier Review should be conducted. A review method can be setup and applied to all new Suppliers of that type. The Review Method will be automatically associated with the new Supplier waiting for the owner to send the Supplier for review by selecting the corresponding icon.
- Selection of EQMS Supplier Manager | Supplier Manager | Supplier Types and choose the Supplier Type you want to amend by selecting anywhere in the record row will display the Supplier Type Details screen similar to this:
- Select the Review Method icon. The overlaid Review Method screen will be displayed similar to this:
![]()
-
Complete the Mandatory Title and the optional Advice fields.
-
Tick the Mandatory check box if suppliers of this type have to be reviewed before being approved.
-
Tick the Enforce Document Attachment check box if the review requires documentary evidence to be attached.
-
Complete the Target Review if the Supplier review has a deadline
-
Tick the Enforce Target Period check box if the review needs to be completed within the target period
-
If the Active check box is not ticked the review method will not be associated with new Suppliers of this type.
-
Select the Save icon to the right in the Review Method header bar and the following overlaid message screen will be displayed:
- Select OK to continue.
- The Supplier Type nn screen will be updated similar to this:
- Additional Reviews can be added by selecting the Review Methods icon again. They can be re-sequenced using the arrows to the left of the Review Method Description
- Defined reviews can be deleted using the Delete icon to the right of the review record row.
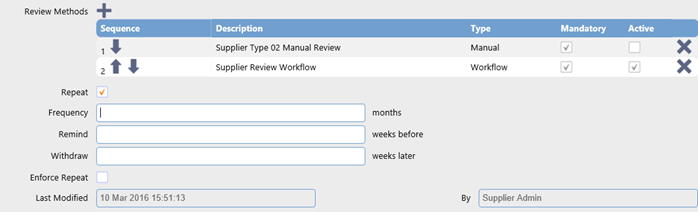
- Tick the Repeat check box if the Supplier review needs performing within a set period. The Suppler details screen will expand similar to this:
![]()
- Complete the Frequency field with the number of months that the Supplier Review is due to be completed again.
- Complete the Remind field with the number of weeks prior to the review that the Supplier Owner is sent a reminder notification Email
- Complete the Withdraw field with the number of weeks after the an incomplete Supplier Review that the Supplier status is set to Withdrawn.
- Tick the Enforce Repeat check box if you want the review settings to be enforced to Suppliers of this type.
- Select Save to confirm
The Review Method defines how the Supplier Review should be conducted. A Workflow review uses predefined workflows with specific actions that must be completed before a Supplier can be Approved. The Review Method will be automatically associated with the Supplier waiting for the owner to send the Supplier for review by selecting the corresponding icon.
- Selection of EQMS Supplier Manager | Supplier Manager | Supplier Types and choose the Supplier Type you want to amend by selecting anywhere in the record row will display the Supplier Type Details screen similar to this:
- Select the Review Method icon. The overlaid Review Method screen will be displayed similar to this:
![]()
- Select the Workflow Review Type radio button and the screen will update similar to this:
![]()
- Choose a mandatory predefined Workflow from the dropdown box.
- Complete the optional Advice field with instructions covering this review method
- Leave the Mandatory check box ticked if suppliers of this type have to be reviewed before being approved.
- Tick the Enforce Document Attachment check box if the review requires documentary evidence to be attached.
- If the Active check box is not ticked the review method will not be associated with new Suppliers of this type.
- Complete the required fields and select the Save icon to the right in the Review Method header bar. The following overlaid message screen will be displayed:
10. Select OK to continue. The Supplier Type screen will be updated similar to this:

11. The Review Methods and be re-sequenced using the Arrow icons to the left of the record rows.
Note:
If there are more than one associated Review Methods they will run in sequence and all will have to be completed prior to Supplier approval
Default review time scales for next Review can be applied to all Supplier of this type.
- Selection of EQMS Supplier Manager | Supplier Manager | Supplier Types and choose the Supplier Type you want to amend by selecting anywhere in the record row will display the Supplier Type Details screen similar to this:
- Tick the Repeat check box. The Supplier Type screen will expand similar to this:
- Complete the mandatory Frequency with the number of months from the last review that a Review should be performed again.
- Complete the mandatory Remind with the number of weeks before the Review is due that the Supplier Owner will get an Email reminder.
- Complete the optional Withdraw with the number of weeks after a Review should have been completed that the Supplier status is automatically set to Withdrawn.
- Tick the Enforce Repeat check box to enforce the Frequency, Remind and Withdraw setting across all Suppliers of this type and make them unalterable.
Note:
If the Withdraw field is populated the Supplier will be withdrawn if a Review is not completed.
Metadata Types, user defined fields, are extra fields of data that you can associate with particular Types of Supplier. The associated Metadata Types can be used for filtering and reporting purposes
The Metadata Types must be created by a SUPADM before they can be associated with the Supplier Type and its subsequent Supplier records.
- Selection EQMS Supplier Manager | Supplier Manager | Supplier Types and choose the Supplier Type you want to amend by selecting anywhere in the record row will display the Supplier Type Details screen similar to this:
- Select the Associated Metadata Types tab in the top grey section of the screen. The Associated Metadata Types screen will be displayed similar to this:
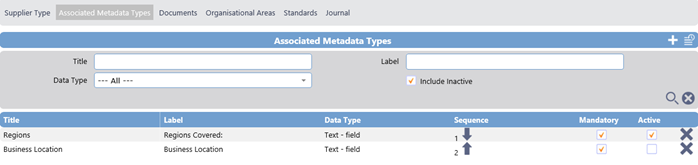
- The associated Metadata Types may be:
- re-sequenced by use of the arrows,
- made Mandatory or Inactive by use of the checkboxes or
- disassociated altogether by selecting the Delete icon.
4. If a Metadata Type is mandatory, it means that the Supplier record must have valid data supplied to this field.
5. If a Metadata Type is not active, then it means it will not be included in any new Supplier record. Where it has been associated it will remain in place.
- Selection EQMS Supplier Manager | Supplier Manager | Supplier Types and choose the Supplier Type you want to amend by selecting anywhere in the record row will display the Supplier Type nn screen similar to this:
- Select the Associated Metadata Types tab in the top grey section of the screen. The Associated Metadata Types screen will be displayed similar to this:
- Select the Associate New Metadata Types icon from the Associated Metadata Types header bar. The Metadata Type Details screen will be presented similar to this:
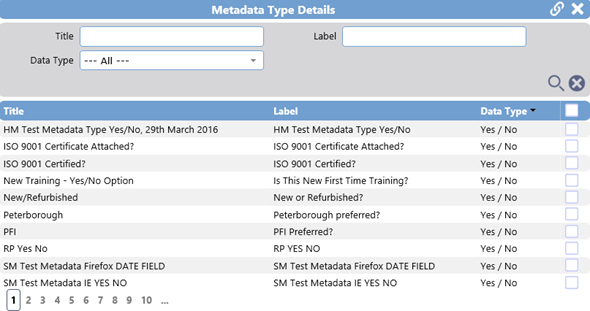
- The Metadata Type Details screen is paginated and records are viewed by selecting the page numbers to the bottom left of the list screen
- List filters are Title, Label, based on a string of characters contained within and Data Type.
- Tick the checkbox to the right of the items you want and associate and select the Metadata Type icon. The following overlaid message screen will be displayed:
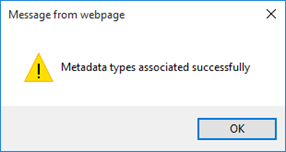
- Select OK to continue. This will return you to the calling screen, where you will see your selected items added to the bottom of the list similar to this:
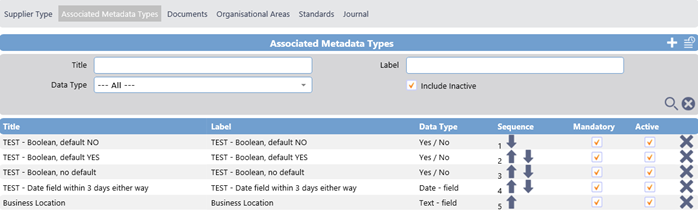
By default, Associated Metadata Types are both Mandatory and Active. If the Mandatory checkbox is un-ticked the field becomes optional, if the Active checkbox is un-ticked the field is removed from all Suppliers of that Type
- You can re-sequence the Associated Metadata Types by selection of the Decrease/Increase Sequence Number icons under the Sequence column. This will alter their position in the Supplier Details screen.
- Unwanted or those Metadata Types associated in error can be removed by selecting the Delete Metadata Association icon to the right of the record.
Documents can be associated with a Supplier Type and these documents will be associated with all Suppliers of this type by default. The attached documents and be free standing files, EQMS Document attachments or EQMS Document links.
1. Select EQMS Supplier Manager | Supplier Manager | Supplier Types, choose the Supplier Type you want to amend by selecting anywhere in the record row and select the Documents tab. The Documents standard filter and list screen will be displayed similar to this:
![]()
2. Select the Upload New Document icon to the right of the Document header bar and the Upload New Document screen will be displayed similar to this:

3. Use the standard Browse functionality to locate the Document, supply the mandatory Title, or tick the Use Filename as Title checkbox, optionally supply the Version and select the Upload Document icon located to the right of the header bar. The following system message will be displayed:

4. Select OK to continue. The Documents screen will be updated with your selection similar to this:

5. The associated document can be viewed by selecting the View document icon to the right of the record row. The document will be displayed in a new browser screen.
6. The Document can be removed by selecting the Delete Document icon located to the far right of the record row. The following system massage will be displayed:

7. Select OK to remove the document or Cancel to leave the document in place
This selection will attach the EQMS Document at this point in time.
1. Select the Attach EQMS Document icon to the right of the Document header bar. The Attach EQMS Document filter and list screen will be displayed similar to this:
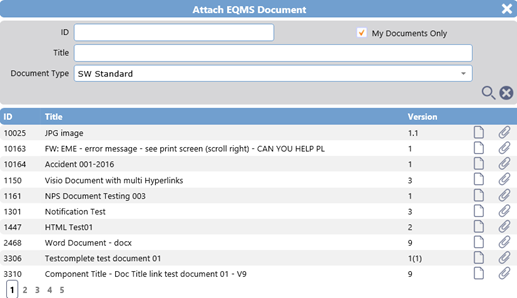
2. The Attach EQMS Document screen is paginated and records are viewed by selecting the page numbers to the bottom left of the list screen
3. List filters are ID, Title, based on a string of characters contained within, Document Type and My Documents Only.
4. Once the required document has been located select the Attach EQMS Document icon located to the right of the record row. When complete the following system message will be displayed:
5. Select OK to continue. The Documents screen will be updated with your selection.
This selection will create a link to the document. When the document is viewed the current Live version will be displayed.
- Select the Link EQMS Document icon to the right of the Document header bar. The Link EQMS Document filter and list screen will be displayed similar to this:
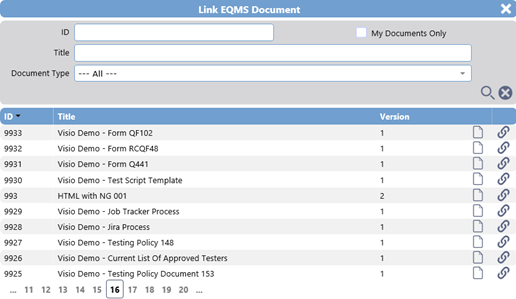
- The Link EQMS Document screen is paginated and records are viewed by selecting the page numbers to the bottom left of the list screen
- List filters are ID, Title, based on a string of characters contained within, Document Type and My Documents Only.
- Once the required document has been located select the Link EQMS Document icon located to the right of the record row. When complete the following system message will be displayed:
- Select OK to continue. The Documents screen will be updated with your selection.
Organisational Areas can be associated with a Supplier Type and these organisational areas will be associated with all New Suppliers of this type by default. The Organisational Areas can be used for filtering and reporting purposes.
- Select EQMS Supplier Manager | Supplier Manager | Supplier Types, choose the Supplier Type you want to amend by selecting anywhere in the record row and select the Organisational Areas tab. The Organisational Areas standard filter and list screen will be displayed similar to this:
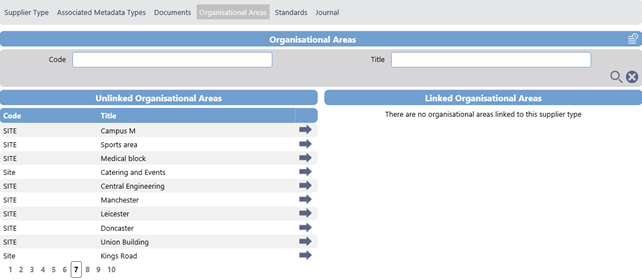
- The Organisational Areas screen is paginated and records are viewed by selecting the page numbers to the bottom left of the list screen
- List filters are Code and Title, based on a string of characters contained within.
- Associate the Organisational Area by selecting the Link Organisational Area icon to the right of the record row. The Organisational Area list screen will be updated similar to this:
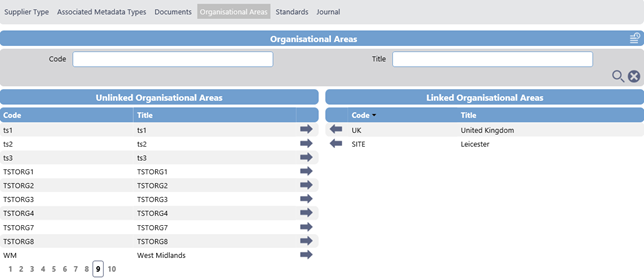
- Associated Organisational Areas can be removed by selecting the Unlink Organisation Area to the left of the record row
Standards can be associated with a Supplier Type and these Standards will be associated with all New Suppliers of this type by default. The Standards can be used for filtering and reporting purposes and can also identify which Standards the Suppliers have to maintain.
- Select EQMS Supplier Manager | Supplier Manager | Supplier Types, choose the Supplier Type you want to amend by selecting anywhere in the record row and select the Standards tab. The Standards standard filter and list screen will be displayed similar to this:
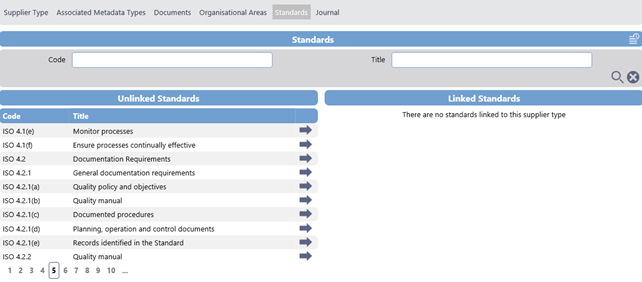
- The Standards screen is paginated and records are viewed by selecting the page numbers to the bottom left of the list screen
- List filters are Code and Title, based on a string of characters contained within.
- Associate the Standard by selecting the Link Standard icon to the right of the record row. The standards list screen will be updated similar to this:
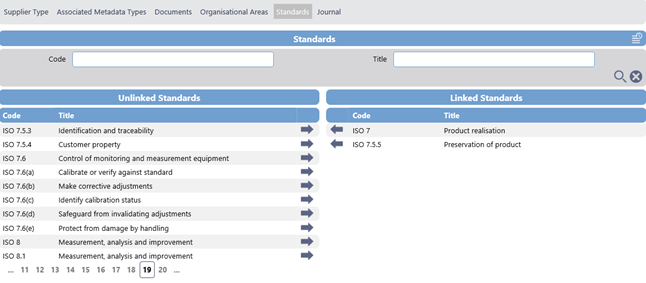
- Associated Standards can be removed by selecting the Unlink Standard to the left of the record row
Journals can be added to a Supplier Type record at any time. A journal entry should contain relevant information about the Supplier Type
- Select Supplier Manager | Supplier Manager | Supplier Types, choose the Supplier Type you want to amend by selecting anywhere in the record row and select the Journals tab. The Journals list screen will be displayed similar to this:

- Comments made in previous journal entries can be view by ticking the expand tick box the to right of the record row.
1. Selection of the New Journal Entry icon to the right of the Journal header bar will display the Add Journal Entry screen similar to this:
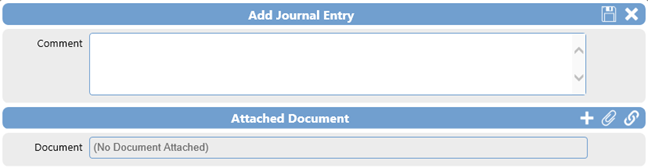
2. Complete the Comments field and select the Save icon to the right of the Add Journal Entry header bar. The Journals list screen will be updated with your entry.
- Selection of the New Journal Entry icon to the right of the Journal header bar will display the Add Journal Entry screen similar to this:
- Complete the Comments field and choose one of the 3 ways in which a document can be associated with the Journal.
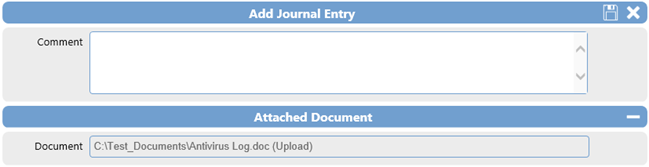
To attach a network document, select the Upload New Document icon located to the right of the Attached Document header bar. The overlaid Upload New Document screen will be displayed similar to this:

- Use the standard Browse functionality to locate the Document, optionally supply the Version and select the Upload Document icon located to the right of the header bar. The Add Journal Entry screen will update similar to this:
- You can remove the Attached Document by selecting the Remove Document icon located to the right of the Attached Document header bar, or select the Save icon to the right in the Add Journal Entry header bar to post the Journal with the free standing document attachment. The following system message will be displayed:
- Select OK to continue
To attach a point in time document from EQMS select the Attach EQMS Document icon located to the right in the Attached Document header bar. The Attach EQMS Document screen will be displayed similar to this:
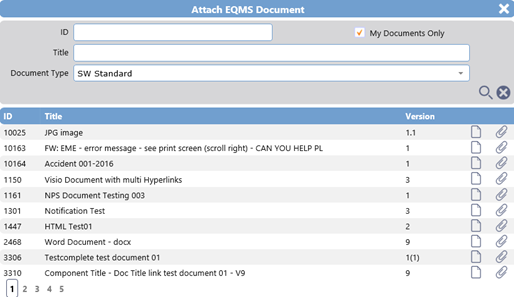
- The Attach EQMS Document screen is paginated and records are viewed by selecting the page numbers to the bottom left of the list screen
- List filters are ID, Title, based on a string of characters contained within, Document Type and My Documents Only.
- Once the required document has been located select the Attach EQMS Document icon located to the right of the record row. The Add Journal Entry screen will update similar to this:
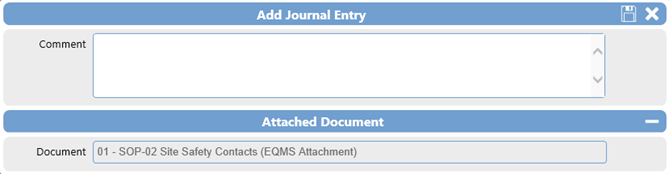
- You can remove the Attached Document by selecting the Remove Document icon located to the right of the Attached Document header bar, or select the Save icon to the right in the Add Journal Entry header bar to post the Journal with the network document attachment. The following system message will be displayed:
- Select OK to continue
To attach a link to the live version of an EQMS document select the Link EQMS Document icon located to the right in the Attached Document header bar. The Link EQMS Document screen will be displayed similar to this:

- The Link EQMS Document screen is paginated and records are viewed by selecting the page numbers to the bottom left of the list screen
- List filters are ID, Title, based on a string of characters contained within, Document Type and My Documents Only.
- Once the required document has been located select the Link EQMS Document icon located to the right of the record row. The Add Journal Entry screen will update similar to this:

- You can remove the Attached Document by selecting the Remove Document icon located to the right of the Attached Document header bar, or select the Save icon to the right in the Add Journal Entry header bar to post the Journal with the EQMS document link. The following system message will be displayed:
- Select OK to continue
|
© Qualsys Ltd 2019 All Rights Reserved |
info@qualsys.co.uk +44 114 282 3338 Aizlewood's Mill, Nursery Street,Sheffield, S3 8ND |