Search is based on keyword.
Ex: "Metadata"
Do not search with natural language
Ex: "How do I create a new metadata type?"
Leave Feedback
Training Courses
Audience: Training Course Owners, Training Administrators
To create new and view/amend existing Training Courses, navigateo to Training Manager | Courses. This will display the Courses List and filter screen similar to below:

The list can be filtered by Training Category, Training Course, based on a string of characters contained within, and a check box for inclusion of inactive records. Select the Search icon to display your filtered list. The list can be sorted by column.
- Select the New Course icon located to the right of in the Courses List header bar. The New Training Course details screen will be displayed similar to this:
![]()
- Complete the mandatory Title, and select a Training Category from the drop-down box
- There are also several additional options available:
- Enable Re-training means that training records are only valid for the defined period and will be reflected as such in reports like the Training Matrix. After that period you will need to manually raise the new training record.
- If you enable re-training you will also have to provide a re-training period in the additional field that will appear
- The Active check box means that the course is currently available for selection when creating new Training Records. This only needs to be disabled if the course is no longer in use.
- Evidence Mandatory requires users to attach proof of their training to the records before it can be confirmed
- Enable Calendar Events means that notifications for training records of this course will include a .ics file so that it can be added to the users preferred calendar application e.g. Outlook, iCal.
- Enable Re-training means that training records are only valid for the defined period and will be reflected as such in reports like the Training Matrix. After that period you will need to manually raise the new training record.
- Check the boxes as required.
- Once complete, select the Save icon located to the right in the header bar to confirm. The Course Details screen will be displayed similar to below:
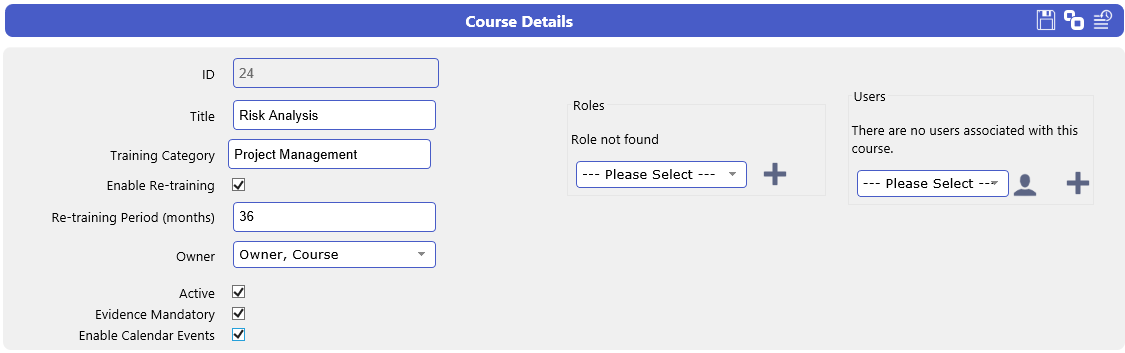
- Once created the Course record can be associated with Roles and Documentation and Metadata Types can be associated with the Course in the additional tabs.
- Display the Course Details screen of the Course you want to associate with a Role.
- Any associated Roles are displayed to the right of the Course Details screen.
- Choose a Role from the drop-down box and select the Add Role icon. You will be presented with the Course Details screen similar to this:
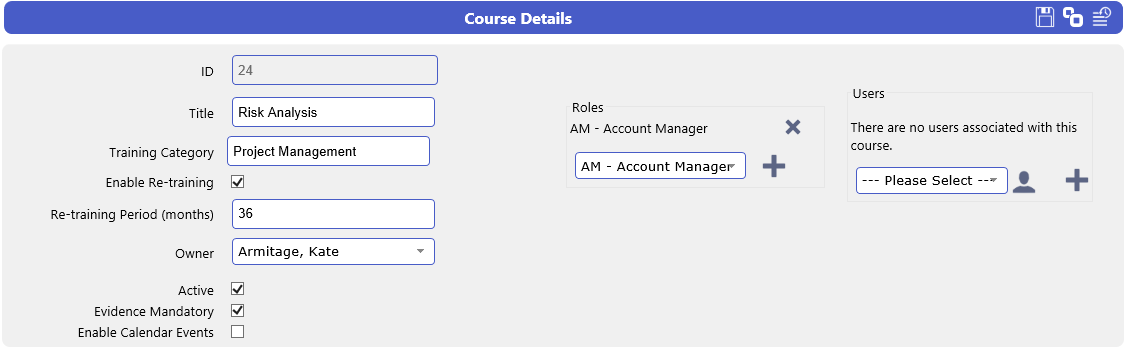
- Any Roles that may have been added in error can be removed by selecting the Remove Role icon to the right of the Role title.
- Display the Course Details screen of the Course you want to associate with a User.
- Any associated Users are displayed to the right of the Course Details screen.
- Choose a User from the drop-down box and select the Add User icon, or select the user icon and choose a user from the User List screen. You will be presented with the Course Details screen similar to this:
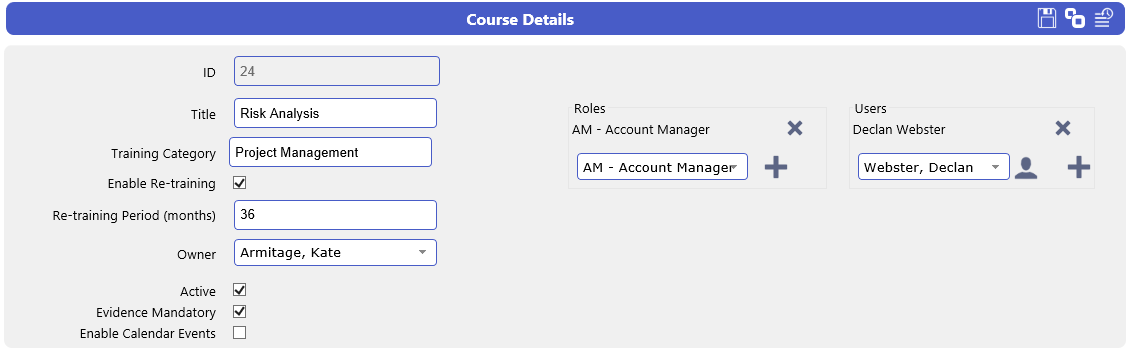
4. Any User that may have been added in error can be removed by selecting the Remove User icon to the right of the Role title.
- Display the Course Details screen of the Course that you want to attach a Document to and select the Documents tab
![]()
- Select the Attach Document icon located to the right of the Documents header bar. The Attach Document overlaid screen will be displayed similar to this:

- Use the Browse functionality to locate the document you wish to associated with the course, populate the mandatory Title and select the Upload icon or select the Cancel icon to reject
Or...
- Select the Supply URL radio button to associate a document or website from a URL link. The Attach Document will update similar to this:

- Complete the mandatory Title and URL and select the Upload icon or select the Cancel icon to reject.
Once your document is attached, the Course Details | Documents screen will be displayed similar to this:

- To view the attached Document or website select the View Document icon to the right of the Document Title.
- To remove the Document from the Course, select the Delete icon far right of the Document Title.
- To stop the document being associated with any Training records created using the Course un-tick the Active checkbox to make the document or website inactive.
Documents from EQMS Document Manager can be linked to a training course so that they are readily available for trainees of the course when raised. It is also possible to link a document that is not currently live in document manager but is currently approved but, awaiting issue.
- Display the Course Details | Documents screen of the Course you want to link an EQMS Document.
![]()
- Select the Link EQMS Document icon located to the right of the Documents header bar. The EQMS Documents overlaid screen will be displayed similar to this:
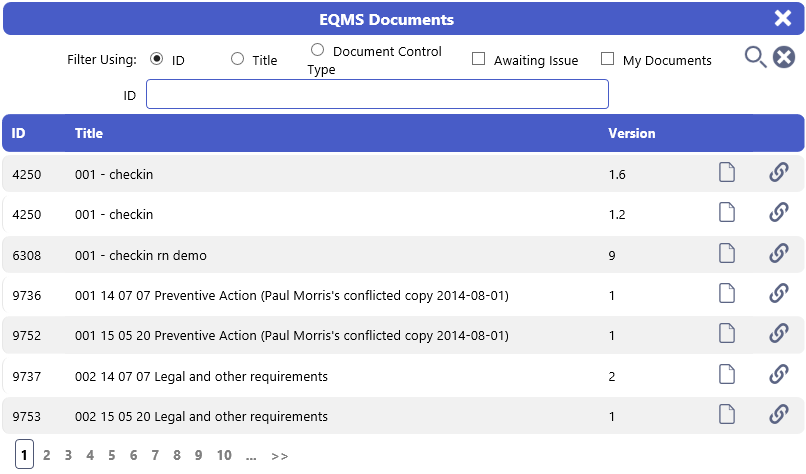
- Use the provided Filters to find the EQMS Document you want to associate with the Course. You can view the document by selecting the View Document icon.
- Select the Link EQMS Document icon to the far right of the document record row to attach the document. The document list for the course will be updated, similar to below:

- To associate the Version of the document that has been Approved (Action sequence 98) but has not been Issued (Action sequence 99) the Awaiting Issue check box should be ticked. This will ensure that the version of a document Awaiting Approval that has been approved and not yet Issued will be associated with a training record. The members of a Department or Role can be trained against the new Work Instruction for example and should Confirm their training records prior to the document being released into EQMS.
- To view the attached Document, select the View Document icon to the right of the Document Title.
- To remove the Document from the Course, select the Delete icon far right of the Document Title.
- To stop the document being associated with any Training records created using the Course un-tick the Active checkbox to make the document inactive.
Metadata Type is the name given to a user defined Data field which can be added to the record of a Course. These additional fields can be designated as mandatory or not and used for filtering and reporting purposes.
- Display the Course Details screen of the Course you want to associate Metadata Types with. And select the Metadata Types tab
![]()
- Select the Associate New Metadata Type icon located to the right in the Associated Metadata Types header bar. The Metadata Type Details filter and list screen will be displayed similar to this:
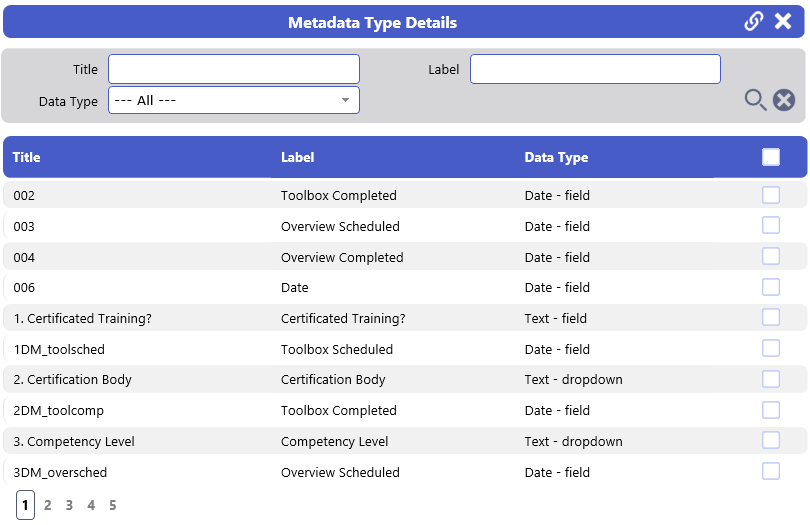
- Choose the Metadata Types you want to associate with this Course by ticking the checkbox to the right of the Metadata Type record row and select the Associate Metadata Types icon located to the right in the Metadata Type Details header bar. The following overlaid system message screen will be displayed:
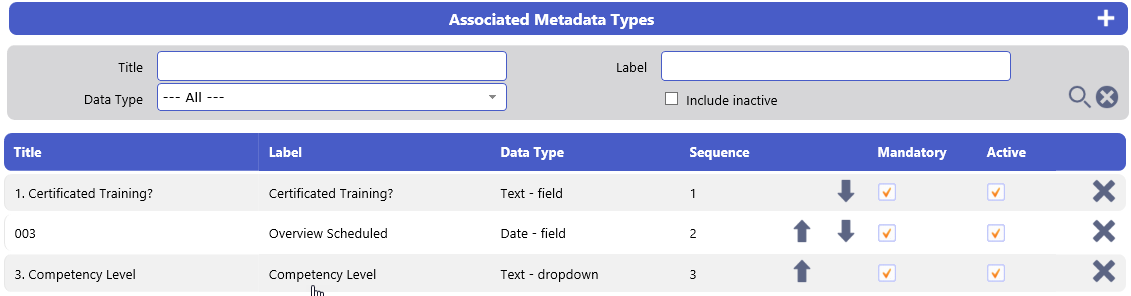
- Select OK to continue. The Course Details screen will be updated with your selected Metadata Types similar to this:
- The selected Metadata Types are now included in all training records created using this Course.
- By default, the Metadata Types are designated as being Mandatory and Active.
- Completion of the associated Metadata Type in the Course record can be made optional by un-ticking the Mandatory checkbox.
- The associated Metadata Type can be made inactive by un-ticking the Active checkbox. This stops the Metadata Type being associated to any new Training Records created using this Course and removes them from existing Training Records.
- Associated Metadata types can be removed from the course by selecting the Delete icon located far right of the record row.
- Select the Course you wish to view or amend by selecting anywhere in the record row. The Course Details screen will be displayed similar to this:
- Amend any of the data fields that are not greyed-out
- Select the Save icon located to the right in the Course Details header bar to confirm the changes.
- If no amendments are required select the Return to Search icon located to the right in the Course Details header bar. The Courses List screen will be displayed.
- The tabs above the header allow you to access associated Documents and Metadata Types (Additional fields)
|
© Qualsys Ltd 2019 All Rights Reserved |
info@qualsys.co.uk +44 114 282 3338 Aizlewood's Mill, Nursery Street,Sheffield, S3 8ND |