Responses
Audience: Audit administrators, Audit managers with response permissions
List | Details | Create | Edit | Copy
Responses are used to define how questions within an audit checklist can be answered e.g. Yes or No, Multiple choice, Date fields, Text fields etc. Each response can be used across as many different questions as you need.
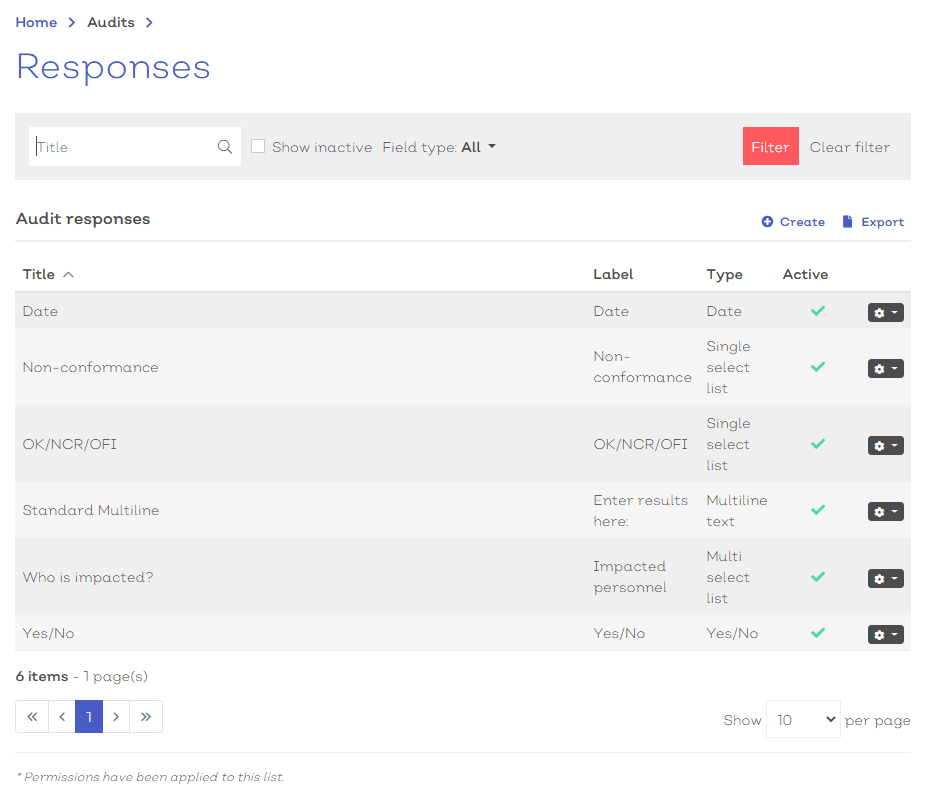
Responses list
To view the list of currently created responses:
- Navigate to Home > Audits > Responses. You should be presented with a screen similar to the one shown here:
[click image to expand]
- Select any option from the list to view the details.
- Standard list screen filters and Export available.
Selecting the options icon [![]() ] at the end of each row will reveal how you can interact with the record.
] at the end of each row will reveal how you can interact with the record.
For responses, the options are**:
| Option | Description |
|---|---|
| View response | Select to view the response details screen |
| Edit response | Select to enter the response details edit screen |
**Permissions apply
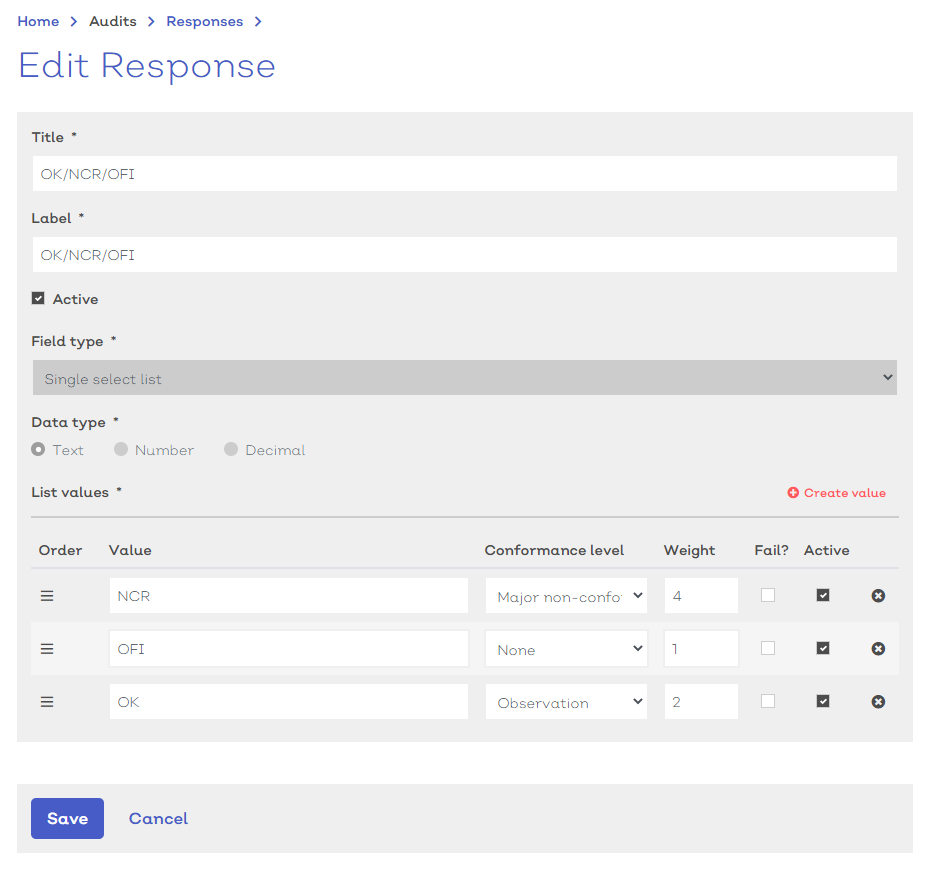
Response details
To view a response's details screen select View from the options dropdown [![]() ]
]
You will be presented with a screen similar to below:
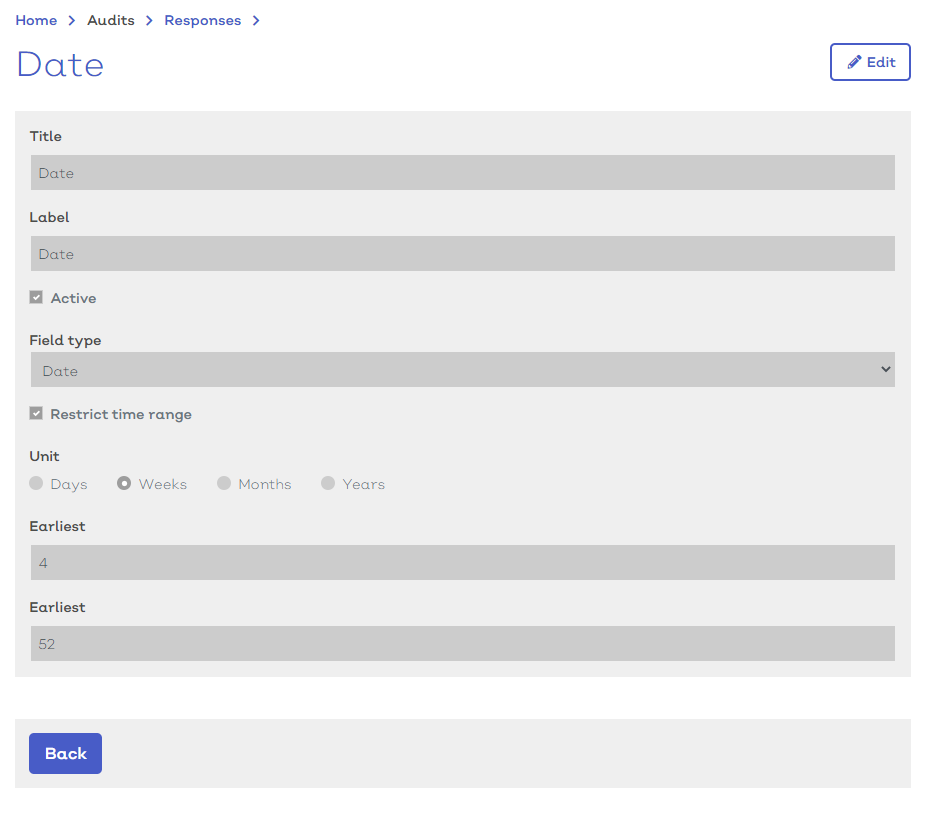
[click image to expand]
The details screen is read only and all fields should be greyed out.
If you have the correct permissions, several options will be available in the top right:
| Icon | Title | Description |
|---|---|---|
| Edit | Allows you to access the edit details screen |
Create new responses
To create a new response:
- Navigate to Home > Audits > Responses.
-
Select
 Create. You should be presented with a screen similar to below:
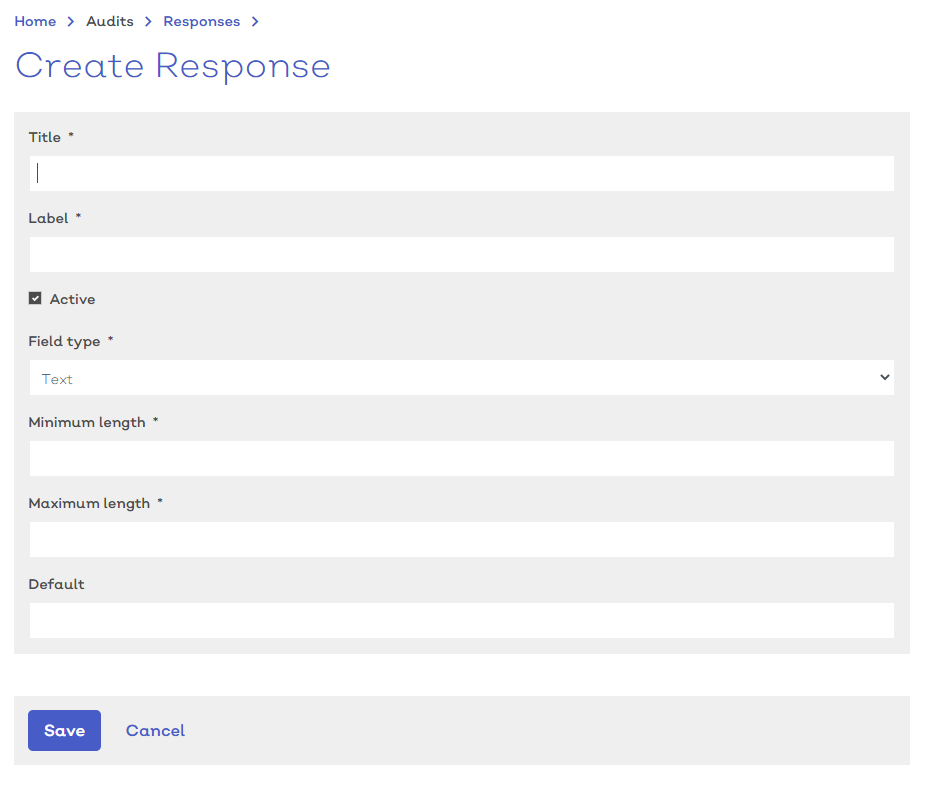
[click image to expand]
- Complete the steps below:
The first section of the response screen contains their key details such as:
- Title - The name of the response field
- Label - The label used to identify the field when used with a record e.g. Date, Please Select, Additional Information.
- Help text - A 'tooltip' that will appear when a user hovers their mouse or pointer over the field when used in a record
Each mandatory field is shown with a * next to the field title.
- Complete the mandatory details fields
- Ensure that the Active
 Active determines whether the record is currently in use. Records not marked as Active will not appear in search results or lists screens unless 'Show Inactive' has been enabled. check box has been ticked.
- Tick the check box for which modules the field will be available in
- Select the Field type. This will update the screen to include additional fields that relate to your chosen option.
- Complete the additional fields, as defined below
![]()
[click image to expand]
| Field | Description |
|---|---|
| Minimum length | The minimum amount of characters that can be entered into this field type for it to be validated |
| Maximum length | The maximum amount of characters that can be entered into this field type |
| Default | Default text that will appear in the field |
- A simple multiline text field
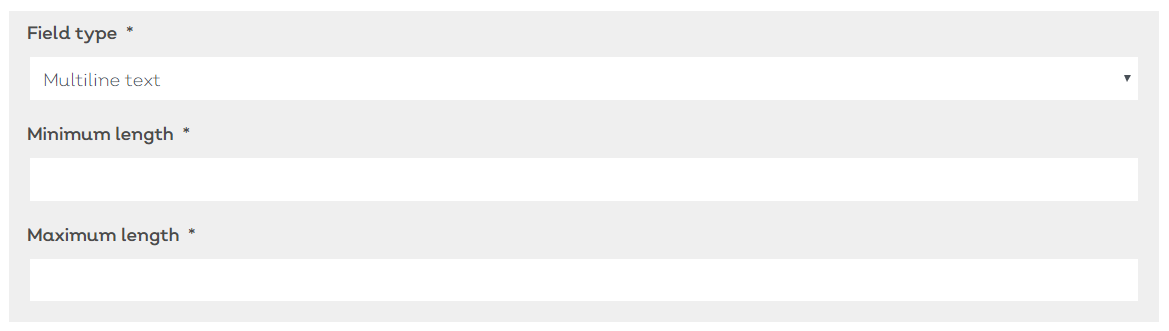
[click image to expand]
| Field | Description |
|---|---|
| Minimum length | The minimum amount of characters that can be entered into this field type for it to be validated |
| Maximum length | The maximum amount of characters that can be entered into this field type |
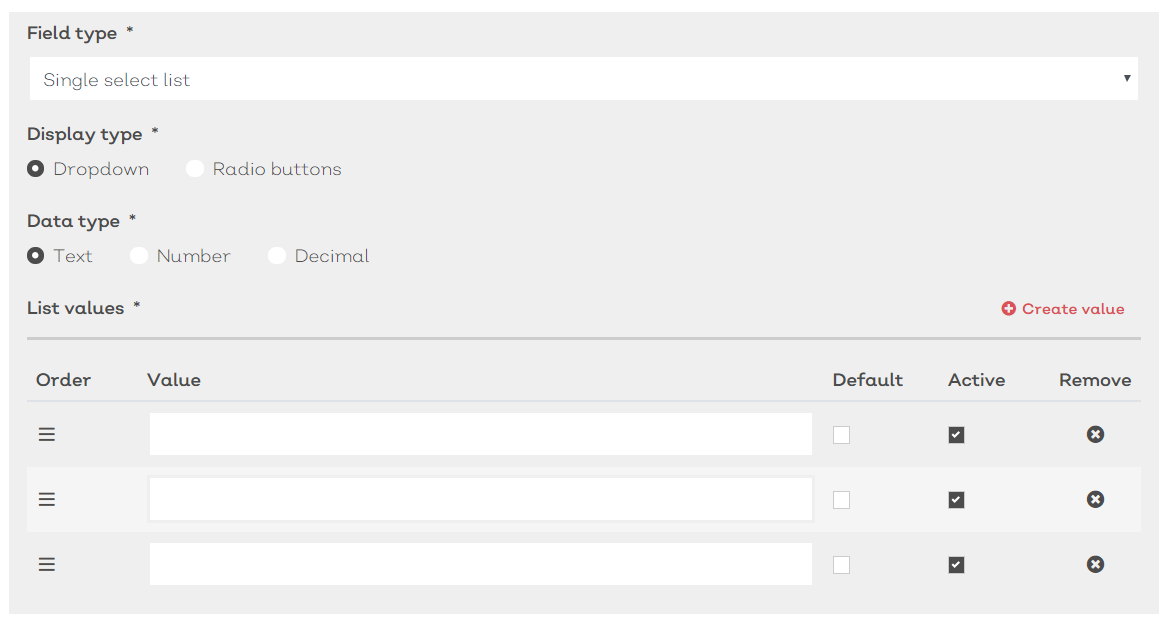
[click image to expand]
| Field | Description |
|---|---|
| Display type |
How the field will be displayed. Choose between:
|
| Data type |
The format for the contents of the field. Choose between:
|
-
To add an item to the list, select
 Create value.
 - Enter a value (format defined by Data type selection above)
- If required, define a default value for the list by ticking the check box in the default column
- If the active check box is ticked, the value will be available for selection
Note:
- To remove a value, select the remove icon

- Use the drag icon
 to re-arrange the values
[click image to expand]
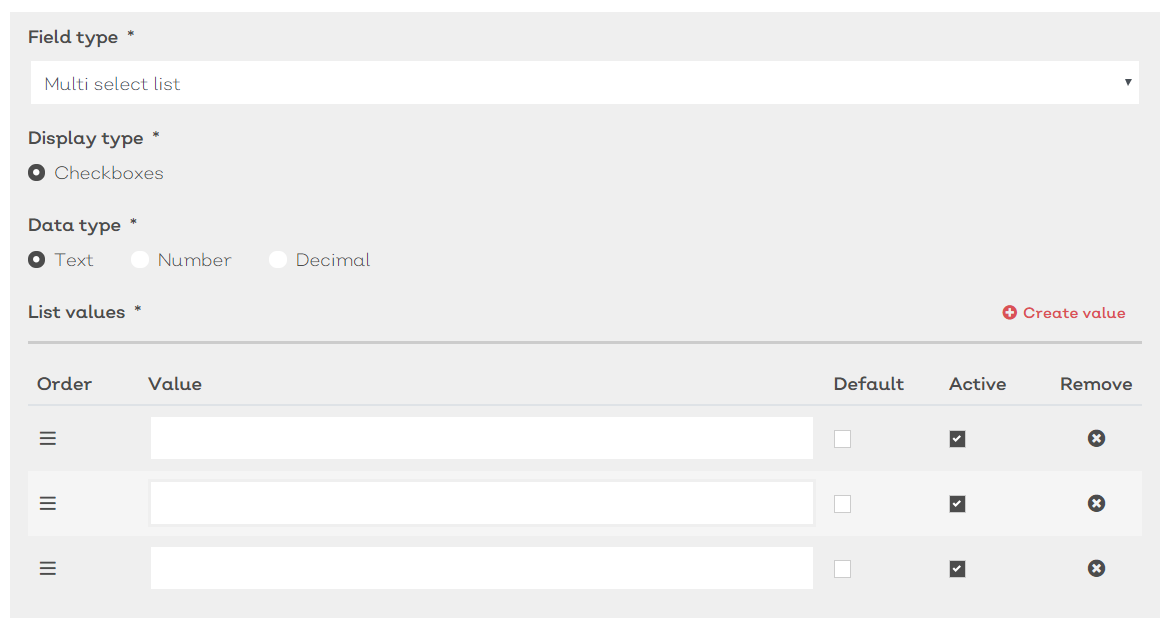
| Field | Description |
|---|---|
| Display type |
How the field will be displayed |
| Data type |
The format for the contents of the field. Choose between:
|
-
To add an item to the list, select
Create value. - Enter a value (format defined by Data type selection above)
- If required, define a default value for the list by ticking the check box in the default column
- If the active check box is ticked, the value will be available for selection
- A simple date field with calendar picker
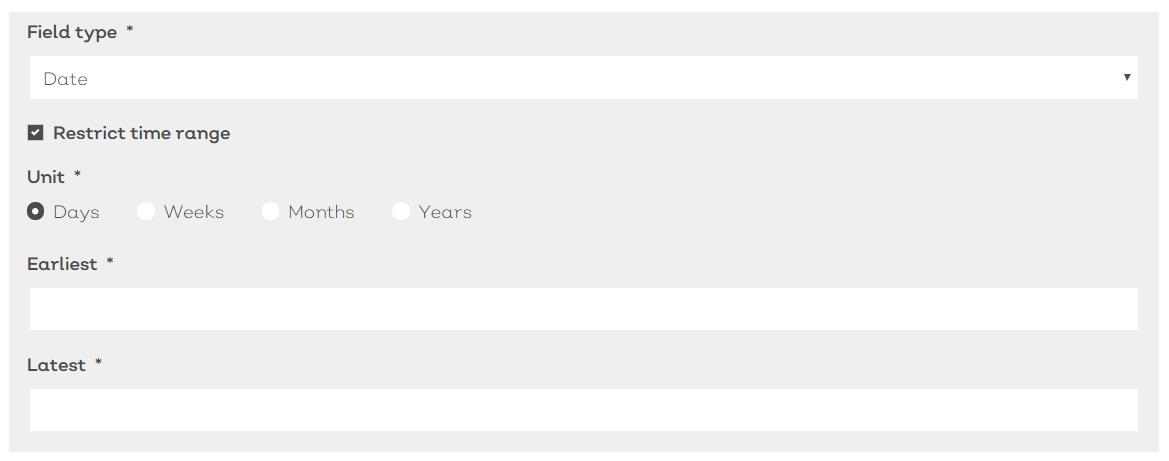
[click image to expand]
| Field | Description |
|---|---|
| Unit |
The unit used for the earliest and latest fields below. Can choose between:
|
| Earliest | How many 'x' (based on selected unit) can the date be set in the past |
| Latest | How many 'x' (based on selected unit) can the date be set in the future |
[click image to expand]
| Field | Description |
|---|---|
| Minimum length | The minimum amount of characters that can be entered into this field type for it to be validated |
| Maximum length | The maximum amount of characters that can be entered into this field type |
| Default | Default number that will appear in the field |
- A binary yes/no selection field

[click image to expand]
| Field | Description |
|---|---|
| Default |
Ability to select a default option for the Yes/No field. |
- Select Save custom field to confirm the creation of the new custom field. If the field is set as active, it will be available for selection in the associated modules.
Note:
- Once a custom field has been saved, the field type is locked and cannot be updated.
Edit existing response templates
Important:
- Editing an existing response will effect any open or in progress records that use the field.
To edit an existing response:
- Navigate to Home > Audits > Responses
- Either:
- Select a response record from the list to view the record details. Then select the edit icon to edit the custom field record.
- Select Edit from the options icon [
 ] in the relevant row
This should present you with the Edit response screen, similar to the one shown here:
[click image to expand]
As an Audit administratoror Audit manager with response permissions you can amend any of the key details fields for an existing response record, unless other custom permissions have been applied.
- Complete the mandatory details fields
- Ensure that the ActiveActive determines whether the record is currently in use. Records not marked as Active will not appear in search results or lists screens unless 'Show Inactive' has been enabled. check box has been ticked.
- Select Save to confirm any changes
Note:
- Any fields marked with a * must be filled in for you to be able to save and update the record details.
- The field type cannot be amended.
For custom fields such as single select, multi select which contain a list of values, you can edit the list of values by either adding new values, amending existing or removing values.
To edit a value:
- Simply amend the text in the value field
To remove a value:
- Select the remove icon
Tip:
- It is advised to make values inactive by un-ticking the Active check box instead of removing outright. This makes it easier to trace back in the future.
To add a new value:
-
Select
Create value. - Enter a value (format defined by Data type)
- If required, define a default value for the list by ticking the check box in the default column.
- If the active check box is ticked, the value will be available for selection in related records