Documents
Audience: Document Managers, Document Administrators
Documents is where all live documents within EQMS are stored. From here you can search through and subsequently manage documents in the system. The documents you can view in the list will be dependant upon your permissions.
Management of multiple documents can be achieved through the use of bulk actions including bulk notifications for users and the ability to set review dates for multiple documents.
Document list
To view the documents list:
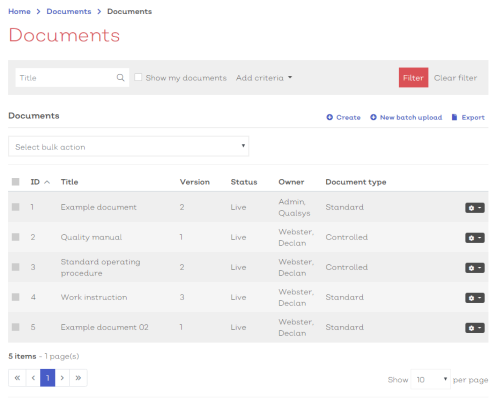
- Navigate to Home > Documents > Documents. You should be presented with a screen similar to the one shown here:
[click image to expand]
Select any document from the list to view the document details
Standard list screen filters and Export available.
You can perform multiple actions from the document list screen by selecting the appropriate option at the top of the list.
Those options are:
| Option | Description |
|---|---|
|
Create |
Select this to create a record for a new document |
|
New Batch Upload |
Select this to upload multiple documents in one batch |
|
Export |
Select this to export the list screen as a table |
Additionally, there are also some actions that can be performed in bulk.
Those actions are:
| Option | Description |
|---|---|
|
Notify Users |
Select multiple documents to notify a group of users or individual users of, these notifications can require an acknowledgement if required |
|
Set Review Dates |
Select multiple documents to set/adjust their review dates to a singular date |
Selecting the options icon [![]() ] at the end of each row will reveal how you can interact with the record.
] at the end of each row will reveal how you can interact with the record.
For document records, the options are:
| Option | Description |
|---|---|
| View document | Select to view the document details screen |
| Edit document | Select to enter the document details edit screen |
Document details
To view the details for a document record:
- Navigate to Home > Documents > Documents
- Select View document from the options dropdown [
 ]
]
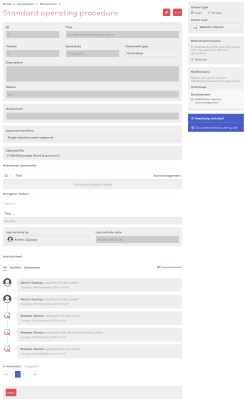
You will be presented with a screen similar to below:
[click image to expand]
The details screen will list all key details to do with the document including its status, document type, issue date and version.
Furthermore, the last date the record had been edited can be viewed along with the name of the editor.
To download the original file:
- Select ‘Download original file’ from the dropdown options icon in the top right
To view the current version of the document:
- Select the 'selected file' option from the document details area
Note:
- The details screen is read only and all fields should be greyed out.
- Select the edit icon in the top right to access the edit details screen
Edit document record
To edit an existing document record:
- Navigate to Home > Documents > Documents
- Select the document from the documents list screen
- Select Edit from the options dropdown [
 ]
]
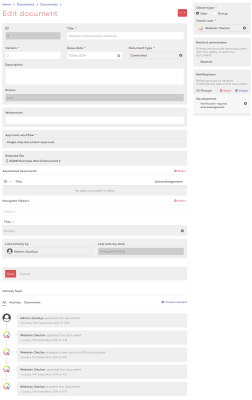
This should present you with the Edit document details screen, similar to the one shown here:
[click image to expand]
As a Document Administrator or Document Manager you can amend any of the key details fields for an existing document record.
- Edit details as required, ensuring all mandatory fields contain suitable data
- Select Save to confirm any changes
Note:
- The ID and status of the document that the record is associated with is system supplied and cannot be amended
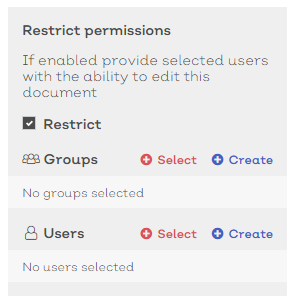
Documents can be restricted so that only users within a defined group can view, edit or delete this document.
If you wish to remove any already applied permissions to the document either:
- Un-tick the Restrict check box, disabling any permissions you may have applied and leave the document unrestricted
- Select the remove icon next to the groups you wish to remove from the permitted list of groups
To restrict the document
- Tick the Restrict check box in the Restrict permissions box in the right hand side column of the screen.
[click image to expand]
- Select
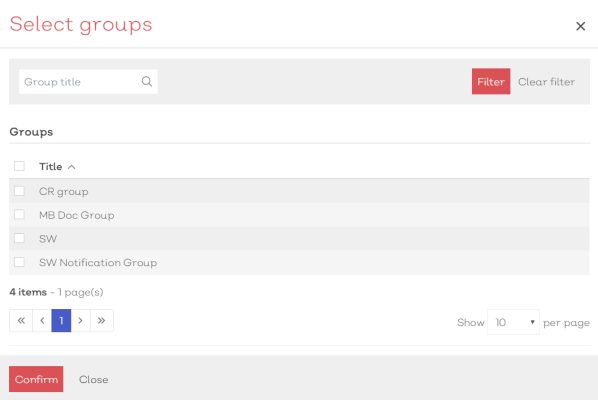
 Select. This will present you with a Select group modal similar to below:
[click image to expand]
-
Use the Select group modal to find the required group(s)
-
Once located, check the box in the far left of the suitable row(s)
-
Select confirm to associate the groups to the document
-
Once a group is selected decide what permissions they will have:
| Option | Description |
|---|---|
|
Viewer |
Can only view the document |
|
Editor |
Can edit this document |
|
Editor with delete |
Has the ability to edit this document and delete it |
|
Administrator |
Can do anything to this document completely unrestricted |
If the group does not exist, you can:
- Select
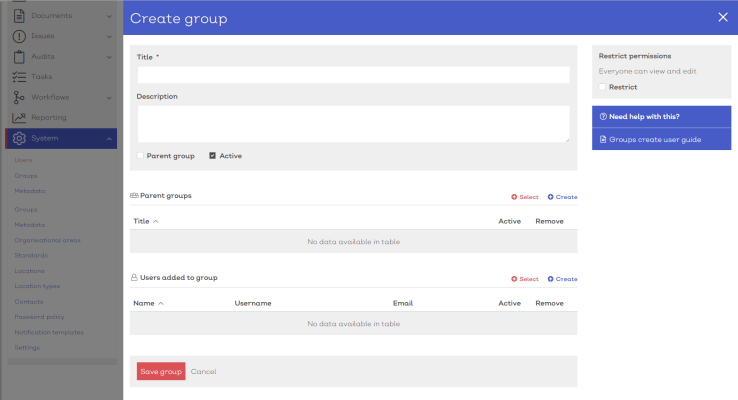
Create. A create new group panel will slide into view, similar to below:
[click image to expand]
- Follow the instructions here to create the new group
Note:
Permissions apply. If you do not have permission to create new groups, the Create option will not be available to you
Documents can generate notifications when a new version goes live. These notifications are sent to groups of users.
To add a notification group:
- Select
 Select under the notifications section on the record. This will present you with a select group modal similar to below
[click image to expand]
- Use the Select group modal (standard list screen filters apply) to find the required group(s)
- Once located, check the box in the far left of the suitable row(s)
- Select confirm to associate the groups to the document
- If you require users to acknowledge receipt of the document tick the ‘Notification requires acknowledgement’ check box
If the group does not exist, you can:
- Select
Create. A create new group panel will slide into view, similar to below:
[click image to expand]
- Follow the instructions here to create the new group
To remove any notification groups:
- Select the remove icon [
] next to the groups you wish to remove from the permitted list of groups
If the document has a status of 'Link to structure' it means that the document is Live but, is not visible via the Navigator. To link the document to the structure via the Document details screen, follow the instructions below.
Note:
- If you have uploaded via Navigator, the link to the structure will already be included in the details.
- You can have more than one link to Navigator folders
- Select
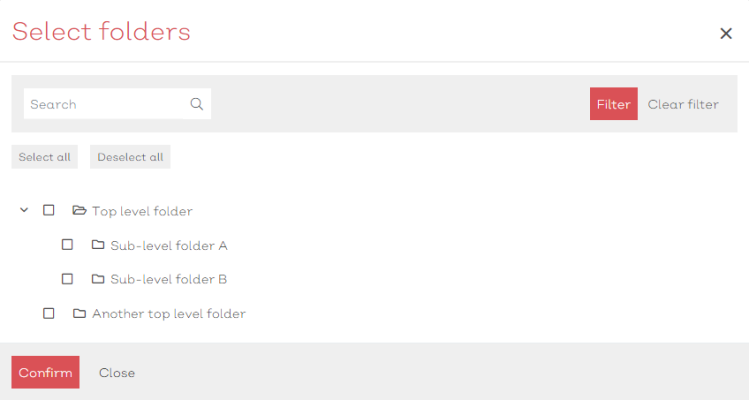
 Select under Navigation folders in the edit document details screen. This will present you with a select folder module, similar to below:
- Within this modal, navigate through the folder structure to where you wish your document to be placed
- Check the box in the far left of the folder you wish to place your document under
Tip:
You can select multiple folders for where you wish your document to be placed. When the document is updated, it will be updated in all locations in the navigator
- Once you have decided upon the documents navigator location, select confirm to add this to the document record
- Once you are happy with all of the details provided with this record, select Save to save the record and complete the upload.
Selecting the drop down icon [![]() ] in the top right of the document details screen reveals additional functionality in association with that document.
] in the top right of the document details screen reveals additional functionality in association with that document.
| Option | Description |
|---|---|
|
New Version |
Select this to upload a new version of the document |
|
Download Original File |
Select this to download the first version of the document when it first entered the system |
| Download |
Download a read only pdf copy of the document Note: .pdf is not available for all file types |
|
Check Out/Check In |
Select this to check the document out to edit. To check back in you will be required to supply a new document version. |
|
Delete |
Selecting this will archive this document |
|
Document Audit Trail |
Select this to view the audit trail (all details of modifications to the record since its creation) |
| Comment | Leave a comment in the Activity feed for the record |
| Share link | Generates a unique share URL for the document |
| Report | Generates a full details report for the document including activity, changes and version history. |
