Groups
Audience: System Administrators
List | Details | Create | Edit | Copy
Groups are a collection of users that can be created for the purposes of notifications and permissions.
This is the area that will be accessed when groups of users need to be created for other modules either for permission or notification purposes.
Furthermore, within this area, user memberships to a group can be managed by adding or removing selected users to groups where relevant. Parent/Child relationships between groups can also be created here. Groups can easily be copied, creating a new group where all details are defined from the pre-existing group to make it easier to create and manage.
Groups list
To view the Groups list:
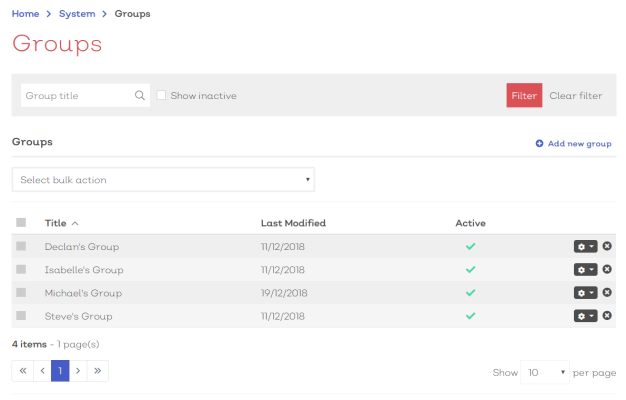
- Navigate to Home > System > Groups. You should be presented with a screen similar to the one shown here:
[click image to expand]
Select any group from the list to view the details.
Standard list screen filters and Export available.
Selecting the options icon [![]() ] at the end of each row will reveal how you can interact with the record.
] at the end of each row will reveal how you can interact with the record.
For group records, the options are**:
| Option | Description |
|---|---|
| View group | Select to view the group details screen |
| Edit group | Select to enter the group details edit screen |
| Copy group | Select to use the group record as a template for a new group |
**Permissions apply
Additionally, you can remove/delete a group by selecting the remove icon ![]() .
.
Group details
To view a group's details screen either:
- Select the group from the list screen
- Select View group from the options dropdown [
 ]
]
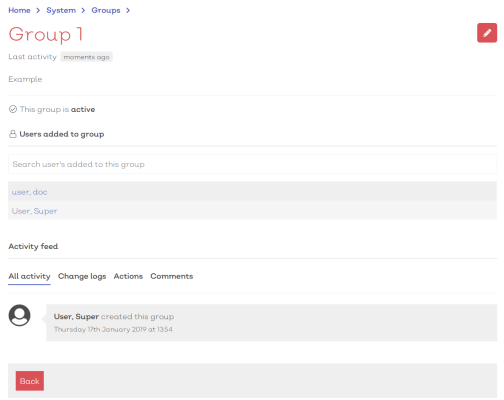
You will be presented with a details screen similar to below:
[click image to expand]
The details screen will list the key details and members of the group. Additionally there is a live activity feed available that will list and changes made to the record.
Note:
- The details screen is read only and all fields should be greyed out.
- Select the edit icon in the top right to access the edit details screen
Create new group
To create a new group record:
- Navigate to Home > System > Groups
- Select
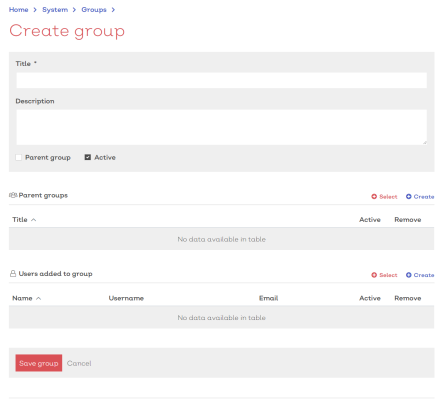
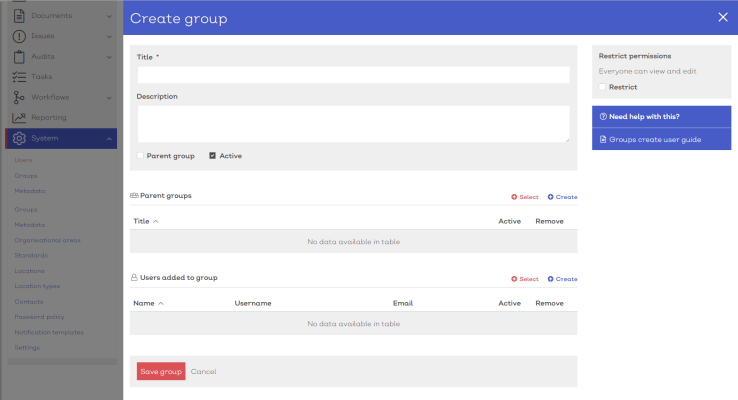
Add new group. You should be presented with a screen similar to below:
The first section of the group details screen contains their key details such as:
- Title
- Description
Each mandatory field is shown with a * next to the field title.
- Complete the mandatory details fields
- Ensure that the Active
 Active determines whether the record is currently in use. Records not marked as Active will not appear in search results or lists screens unless 'Show Inactive' has been enabled. check box has been ticked.
- Tick the Parent group
 A group which is used to help collate together multiple child groups instead of individual users.
If you add parent group to a restricted list of users, all child groups inherit the parent's permissions.
If you add a child group to a restrited list of users, the parent group DOES NOT inherit the child's permissions. check box if you want the group to be a parent
A group which is used to help link together multiple child groups. If you add a parent to a child group, members of the child group will inherit any permissions that have been granted to the parent.
Note:
- A parent DOES NOT inherit the permissions of a child group.
- A group cannot be a parent if it has individual users as group members
If you wish to associate the new group with a single or multiple parent groups:
- Select
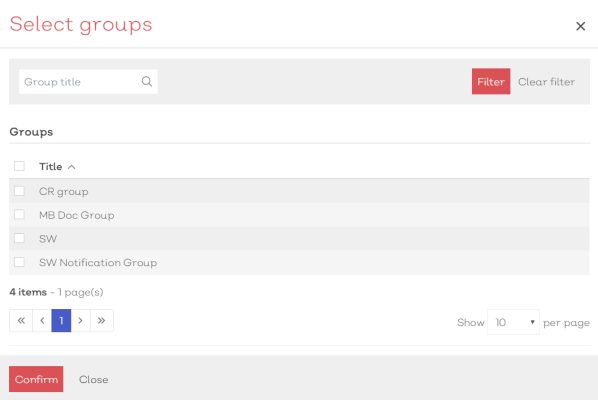
 Select. This will present you with a Select group modal similar to below:
Note:
- Only groups set as parent groups will appear
[click image to expand]
Standard list screen filters apply
- Use the Select group modal (standard list screen filters apply) to find the required group(s)
- Once located, check the box in the far left of the suitable row(s)
- Select confirm to associate the group to the selected parent group(s)
If the parent group does not yet exist, you can:
- Select
Create. A create new group panel will slide into view, similar to below:
[click image to expand]
- Follow the instructions here to create the new group.
Important:
Remember to check the Parent group check box to be able to associate the newly created group as a parent.
[click image to expand]
To associate users with the group:
- Select
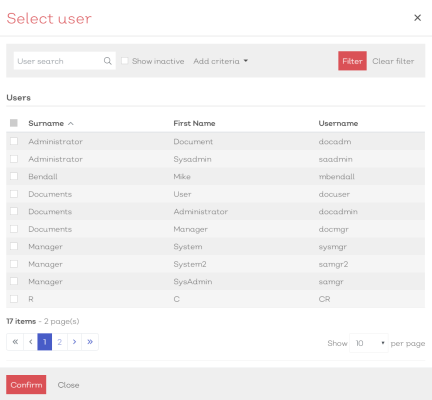
 Select. This will present you with a Select user modal similar to below:
[click image to expand]
- Use the Select user modal (standard list screen filters apply) to find the required user(s)
- Once located, check the box(es) in the far left of the suitable row
- Select confirm to associate the selected user as the Line Manager
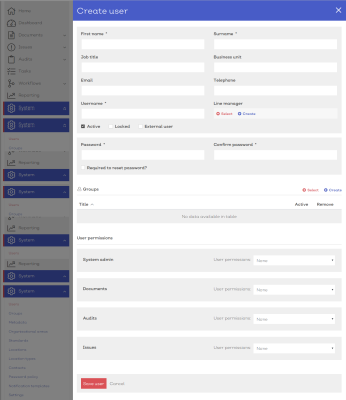
If the required User has not yet been created, you can select Create. A create new user panel will slide into view, similar to below:
[click image to expand]
- Follow the Create new user instructions as defined here
- Select Save user once all required fields are completed. The new user will be created and will be automatically associated with the group
- To cancel, select the close icon in the panel header bar
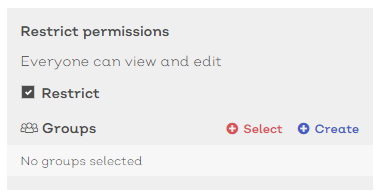
Groups can be restricted so that only users within another defined group an view and edit the details.
To restrict the group:
- Tick the Restrict check box in the Restrict permissions box in the top right of the screen.
- Select
 Select. This will present you with a Select group modal similar to below:
[click image to expand]
- Use the Select group modal (standard list screen filters apply) to find the required group(s)
- Once located, check the box in the far left of the suitable row(s)
- Select confirm to associate the user to the selected group(s)
If the group does not yet exist, you can:
- Select
Create. A create new group panel will slide into view, similar to below:
- Follow the instructions here to create the new group
- Select Save group to confirm the creation of the new group record.
Edit existing group
To edit an existing group record:
- Navigate to Home > System > Groups
[click image to expand]
- Either:
- Select a group record from the list to view the record details. Then select the edit icon to edit the group record.
- Select Edit group from the options icon [
 ] in the relevant row
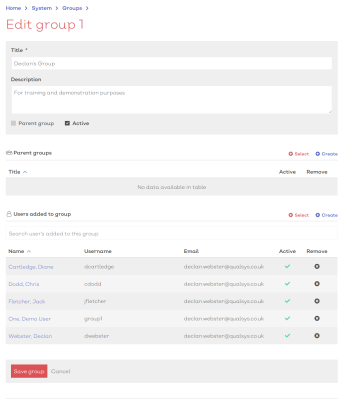
This should present you with the Edit group details screen, similar to the one shown here:
[click image to expand]
As a System administrator you can amend any of the key details fields for an existing group record.
- Complete the mandatory details fields
- Ensure that the Active
 Active determines whether the record is currently in use. Records not marked as Active will not appear in search results or lists screens unless 'Show Inactive' has been enabled. check box has been ticked.
 -
Tick the Parent group
 A group which is used to help collate together multiple child groups instead of individual users.
If you add parent group to a restricted list of users, all child groups inherit the parent's permissions.
If you add a child group to a restrited list of users, the parent group DOES NOT inherit the child's permissions. check box if you want the group to be a parent
 - Select Save user to confirm any changes
Note:
- Any fields marked with a * must be filled in for you to be able to save and update the record details.
- A group cannot be changed from a child to a parent if there are individual users associated with the group. Remove all individual users to be able to tick the Parent group check box.
A group which is used to help link together multiple child groups. If you add a parent to a child group, members of the child group will inherit any permissions that have been granted to the parent.
However:
- A parent DOES NOT inherit the permissions of a child group.
If you want to remove the Parent group(s) of the current child group
If you wish to associate the group with a single or multiple parent groups:
- Select
 Select. This will present you with a Select group modal similar to below:
Note:
Only groups set as parent groups will appear
[click image to expand]
Standard list screen filters apply
- Use the Select group modal (standard list screen filters apply) to find the required group(s)
- Once located, check the box in the far left of the suitable row(s)
- Select confirm to associate the user to the selected group(s)
If the parent group does not yet exist, you can:
- Select
Create. A create new group panel will slide into view, similar to below:
[click image to expand]
- Follow the instructions here to create the new group.
Important:
Remember to check the Parent group check box to be able to associate the newly created group as a parent.
[click image to expand]
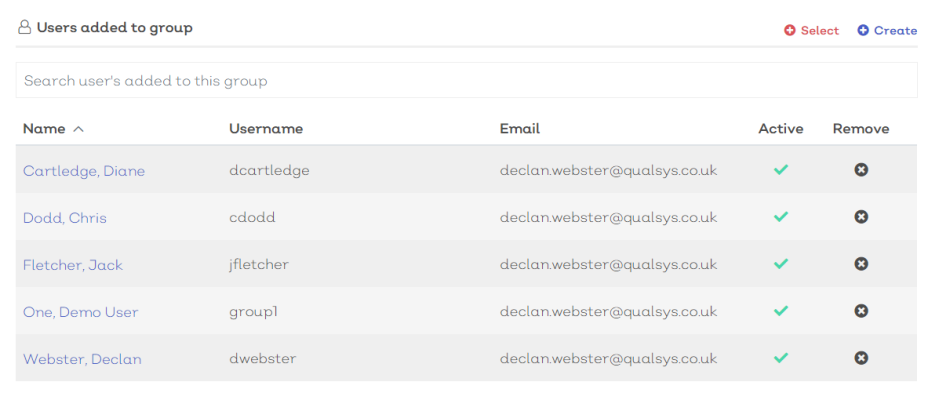
To remove associated users from the group:
To associate users with the group:
- Select
 Select. This will present you with a Select user modal similar to below:
[click image to expand]
- Use the Select user modal (standard list screen filters apply) to find the required user(s)
- Once located, check the box(es) in the far left of the suitable row
- Select confirm to associate the selected user as the Line Manager
If the required User has not yet been created, you can select Create. A create new user panel will slide into view, similar to below:
[click image to expand]
- Follow the Create new user instructions as defined here
- Select Save user once all required fields are completed. The new user will be created and will be automatically associated with the group
- To cancel, select the close icon in the panel header bar
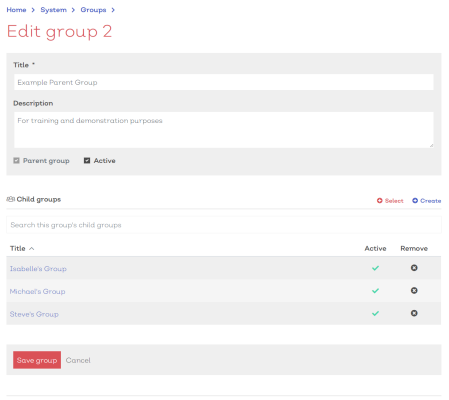
If the group you wish to edit is a Parent group, you will instead see a screen similar to below:
[click image to expand]
If you want to remove a Child group(s) from the current parent group
If you wish to associate a child or multiple child groups with the parent group:
- Select
 Select. This will present you with a Select group modal similar to below:
Note:
Only groups set as child groups will appear
[click image to expand]
Standard list screen filters apply
- Use the Select group modal (standard list screen filters apply) to find the required group(s)
- Once located, check the box in the far left of the suitable row(s)
- Select confirm to associate the user to the selected group(s)
If the child group does not yet exist, you can:
- Select
Create. A create new group panel will slide into view, similar to below:
[click image to expand]
- Follow the instructions here to create the new group.
Groups can be restricted so that only users within another defined group an view and edit the details.
If you want to remove any already applied permissions from a group either:
- Un-tick the Restrict check box to remove ALL permissions on the group
- Select the remove icon
next to the groups you wish to remove from the permitted list of groups
To restrict the group:
- Tick the Restrict check box in the Restrict permissions box in the top right of the screen.
- Select
 Select. This will present you with a Select group modal similar to below:
[click image to expand]
- Use the Select group modal (standard list screen filters apply) to find the required group(s)
- Once located, check the box in the far left of the suitable row(s)
- Select confirm to associate the user to the selected group(s)
If the group does not yet exist, you can:
- Select
Create. A create new group panel will slide into view, similar to below:
- Follow the instructions here to create the new group
Copy group
Copying a group record allows you to use an existing group record as a template for a new group.
To copy a group:
- Navigate to Home > System > Groups
- Either:
Select a group record from the list to view the record details. Then select the copy group from the more options icon.
From the list screen, select Copy group from the options icon [
 ] in the relevant row
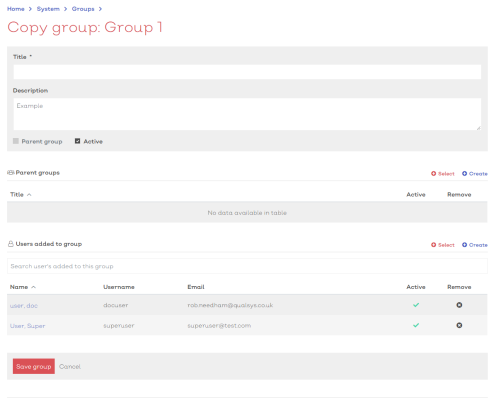
This should present you with the copy group details screen, similar to the one shown here:
[click image to expand]
The new group record should include key details from the copied user record:
- Description
- Parent groups
- Users
To create the new group:
- Amend details
- Complete mandatory fields
- Select Save group to confirm and create the new group record
- For additional information see here
