Workflow templates
Audience: Module administrators, Managers with workflow permissions
Workflow list | Details | Create new | Edit existing | Copy
Workflow templates are available across all modules and enable you to define and control your processes through the system, from document approvals, to corrective action plans and risk assessments.
Each workflow can be can be as simple or as complex as required, making use of parallel steps and decision points where needed.
Workflow List
To view the list of currently created workflow templates:
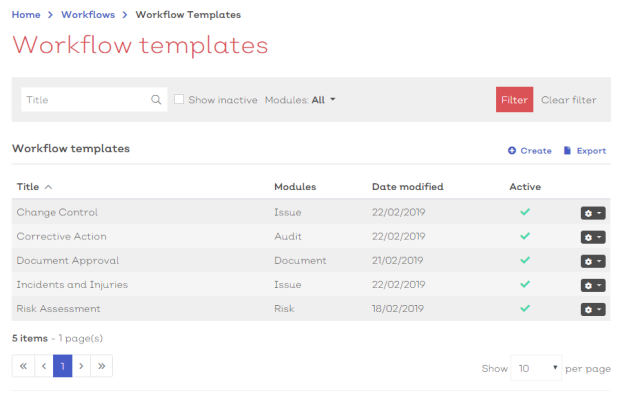
- Navigate to Home > Workflows > Workflow templates. You should be presented with a screen similar to the one shown here:
Note:
- Workflow can also be selected from within each specific area of the system.
[click image to expand]
- Select any option from the list to view the edit workflow screen.
- Standard list screen filters and Export available.
Selecting the options icon [![]() ] at the end of each row will reveal how you can interact with the record.
] at the end of each row will reveal how you can interact with the record.
For workflow template records, the options are:
| Option | Description |
|---|---|
| Edit |
|
| Copy |
|
**Permissions apply
Create new workflow
To create a new workflow template:
- Navigate to Home > Workflows> Workflow templates.
-
Select
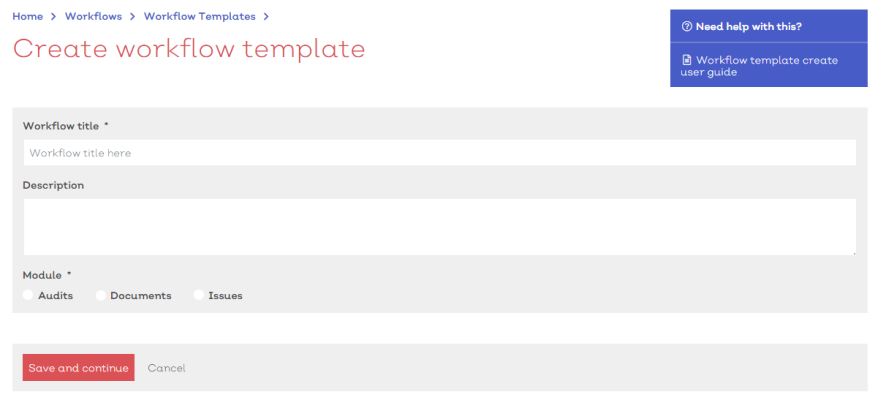
Create. You should be presented with a screen similar to below:
[click image to expand]
- Complete the steps below:
The first section of the workflow template details screen contains their key details such as:
- Title - The name of the workflow template
- Description - A useful description of the process and its purpose
- Module - Which area of the system this process primarily relates to e.g. Document approvals would be linked with Documents, CAPA would be linked with Issues.
Each mandatory field is shown with a * next to the field title.
- Complete the mandatory details fields
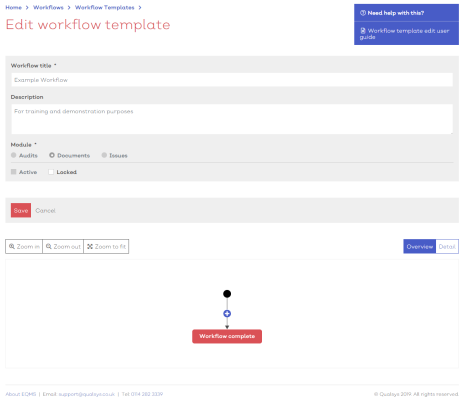
- Select Save and continue to confirm the creation of your new workflow template. The screen will refresh to reveal some additional fields and the workflow canvas, similar to below
[click image to expand]
- Ensure that the Active
 Active determines whether the record is currently in use. Records not marked as Active will not appear in search results or lists screens unless 'Show Inactive' has been enabled. check box has been ticked.
Note:
A workflow template cannot be made active until at least one action has been added
- Build your workflow, as defined below
[click image to expand]
Viewing the workflow canvas
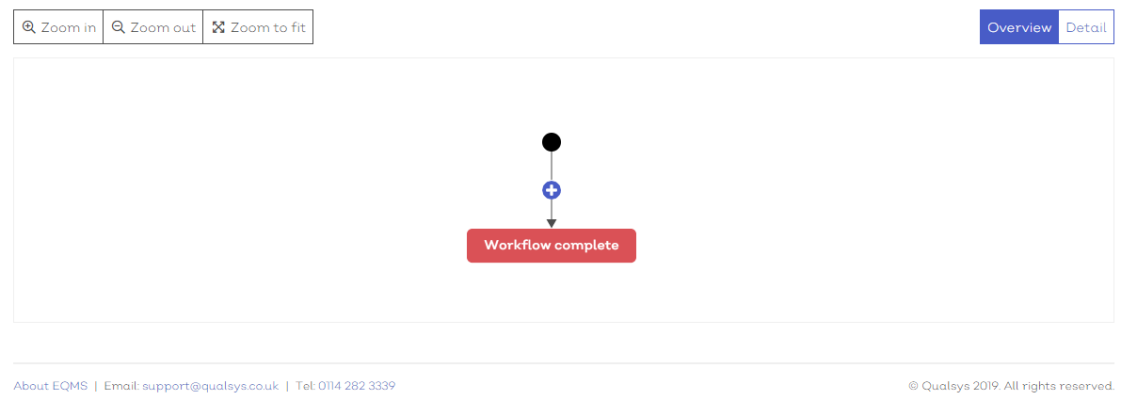
Workflow canvas key
| Item | Description |
|---|---|
| Start | A simple node to identify the start point of the workflow |
| Add new step |
Add new step to workflow |
| Workflow complete | End of workflow merge node. All workflow branching paths will merge back together at this point and complete the workflow. |
To add a step to a workflow:
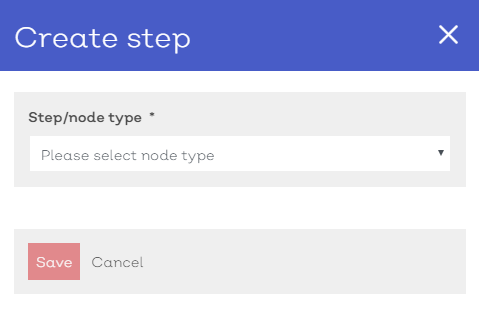
- Select the add step icon:
. A panel will appear to allow you to define what the step contains
[click image to expand]
Step types
| Option | Description |
|---|---|
| Standard aka 'Step' | Can include multiple standard actions to be carried out in sequence |
| Decision step | Must include a single action with an outcome. Each outcome leads to its own branch of the workflow |
| Parallel step |
Can include multiple standard actions to be carried out in sequence |
| Parallel decision step | Must include a single action with an outcome. Each outcome leads to its own branch of the workflow |
Note:
- Parallel steps can only be selected from an add step node above a previously created action
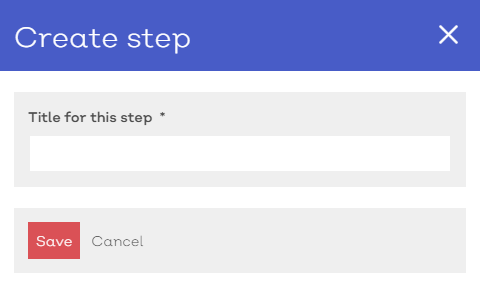
- Select the Step type. The panel will update, similar to below:
[click image to expand]
- Provide a title for the step
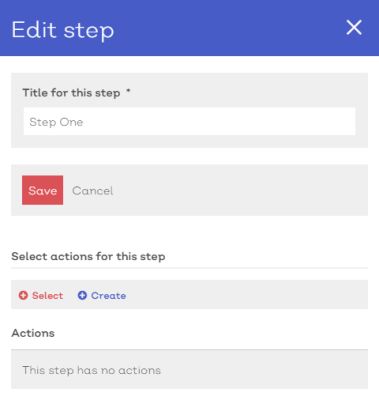
- Select Save. The panel will update again
[click image to expand]
- Choose to either
 Select or
 Create an action to include in this step
- If you select
Create the create screen will appear in a slide out panel. See here for how to create a new action type.
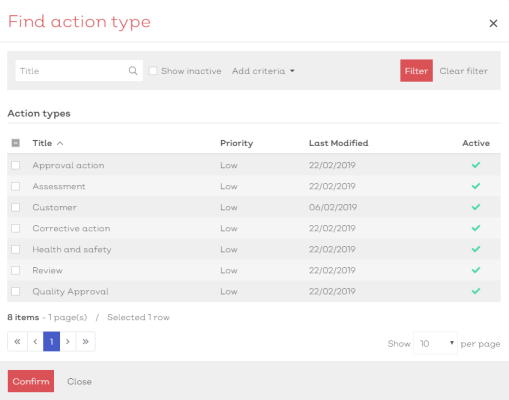
- If you select
 Select you will be presented with a Find action type screen, similar to below:
- If you select
[click image to expand]
Note:
- Only standard actions will be available for selection in a standard or parallel step.
- Only actions with an outcome will be available for selection in a decision or parallel decision step
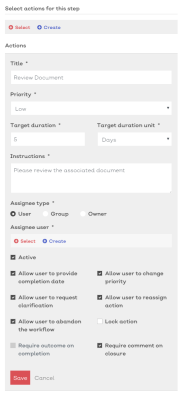
- To select an action type from the Find action type modal check the box in the relevant row and select confirm. The details from the action template will now populate the Edit Step panel, similar to below:
[click image to expand]
- Edit the details of the action as required. For more information on editing the details of an action, see here
- Assign an actionee
- Select whether the actionee is:
- User - An individual named user
- Group - A specified group of users. A specific actionee will need to be chosen when workflows using this template are issued
- Owner - The owner of the individual record the workflow is associated with
- Select whether the actionee is:
- Select save to confirm and add the action to the new workflow step
Note:
- You can add multiple actions into a single step. When the step is reached during a live process, the actions within the step will be issued sequentially
Tip:
- A standard or parallel step do not require actions to be added. Instead, you can use them as a way of merging branching paths back together. When a workflow of this type is issued, the process will simply pass through the empty steps.
Edit existing workflow
To edit an existing workflow:
- Navigate to Home > Workflows> Workflow templates.
- Either:
- Select a workflow template from the list to view the edit workflow template screen
- Select Edit workflow template from the options icon [
 ] in the relevant row
- Select any step from the workflow to open the Edit Step panel. From here you can edit the step title and the details of the actions within.
- Select the edit icon next to any action to view the action details. For more information on action details, see here
- To remove an action, select the delete icon next to the relevant action in the list
Copy existing workflow
WORK IN PROGRESS - MORE CONTENT COMING SOON
