Carrying out audits
Audience: Auditors
Access | Associated items | Complete checklist | Attach evidence |
Raise findings | Submit audit | Close audit
This area of the guide is intended to run you through the overall process of carrying out an audit in EQMS, from responding to questions in the checklist and attaching evidence through to raising findings and associated actions.
For information on creating a new audit record, see here.
Access the audit
To access an audit record:
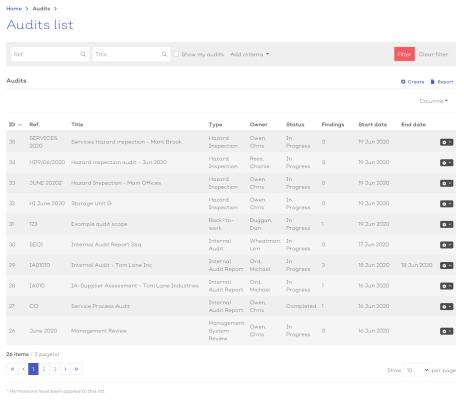
- Navigate to Home > Audits > Audits list. You should be presented with a screen similar to below:
[click image to expand]
Select an audit from the list to view the record details.
Note:
- Only permitted users can access the editable audit record.
Audit team
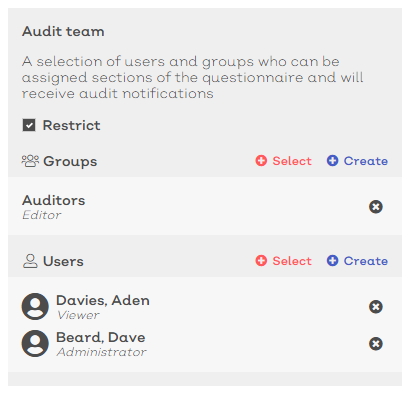
An audit team is a group of users and system groups that are granted permission to View, Edit or Delete audits of this type. Additionally, members of the audit team will receive relevant notifications for records of this type.
The default audit team for an audit record is defined by the audit type. If the defined audit team is not 'locked' at the type level, audit managers and administrators are able to add and remove users from the audit team for each individual record.
For more information on editing the audit team, see here.
Assigning auditors
Sections of the audit questionnaire can be assigned to individual auditors (as defined by the audit team). To assign an auditor to a whole checklist orindividual sections:
- Select the Questionnaire tab of the audit record.
- Select the more options menu button in the header of either a checklist or an individual section.
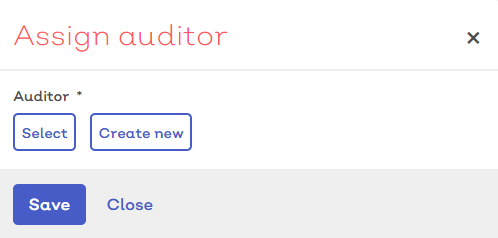
- Select 'Assign Auditor''. You will be presented with an Assign auditor modal, similar to the one shown here:
[click image to expand]
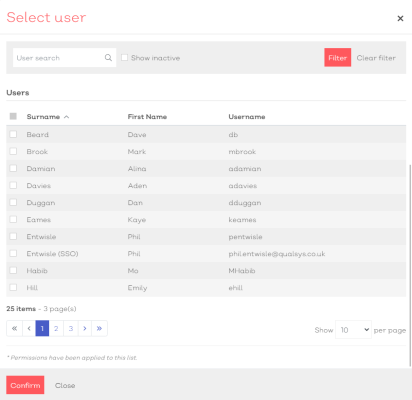
- Choose 'Select' to reveal a list of potential auditors.
[click image to expand]
- Tick the box in the row of the auditor you wish to assign then select Confirm
- Select Save to assign the selected auditor.
Note:
- Only users listed as members of the records Audit team are able to be assigned as Auditors against the checklists in the questionnaire.
- Each auditor can be assigned to multiple sections, and similarly, each record can have different auditors associated with each section of the checklists.
Complete the checklist
To complete a checklist (or section of a checklist):
- Ensure that the status of the audit record is set to 'In Progress'
- Select the Questionnaire tab from within an Audit record. All of the associated checklists will be listed here.
- Select a checklist header to expand and reveal the sections of questions within. Look which sections of the checklist have been assigned to you. If so, your name will be listed in the Auditor field of the section header. Before you begin the audit, the status for the section should read 'Not started'.
- Select the header for the section you want to complete to reveal the individual question within. Questions in a checklist can appear in multiple formats from multiple choice to date fields. For more information on each type of response, see below:
Text fields can appear in two formats, single and multi-line.
- To respond using a text field, simply answer the question by typing out your response.
Note: There may be settings on the field that apply minimum and maximum field lengths.
Select lists come in both single and multi-select options. They may also appear as simple Yes/No responses.
- For a single select list, choose which of the options you believe best applies to the question that is posed.
- For multi-select lists, the interaction is the same but you can select as many of the available responses as you think applies.
- Selected responses will be highlighted in blue.
- To respond to a date field, click the calendar icon to reveal the calendar selection drop down.
- Select the required date.
Note: Some date fields may have been restricted, forcing you to select a date within a specific date range.
Numeric fields come in both whole number and decimal number varieties.
- To respond using a numeric field, simply type the relevant numeric response in the field. Decimal fields will require that the response includes a decimal point.
Note: There may be maximum and minimum length field restrictions
View associated items
Associated items may be associated with questions at the Checklist template level to provide specific and useful information to the auditors such as standard operating procedures or reference material.
Also, items can be associated with the overall audit instead of a specific question.
To view items associated with a question:
Note: If an item is associated with a question, the number bubble in the Associated items field underneath the question will display how many items are associated. If no items are associated, the field will read '0'
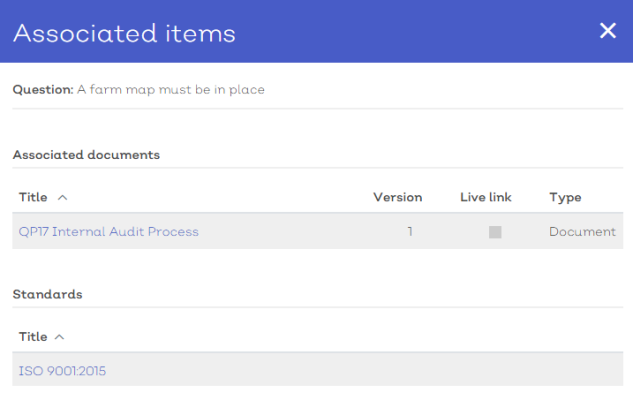
- Select 'Associated items' as displayed underneath each individual question field. This will reveal the associated items list, similar to the one shown here:
[click image to expand]
- Associated items are split into different sections for each type of item e.g. Documents, Standards.
- Select an item from the list to view the record details screen in another pop-up panel.
- To return to the audit, simply close the panels using the large close 'X' icon in the top right.
To view items associated with an audit record:
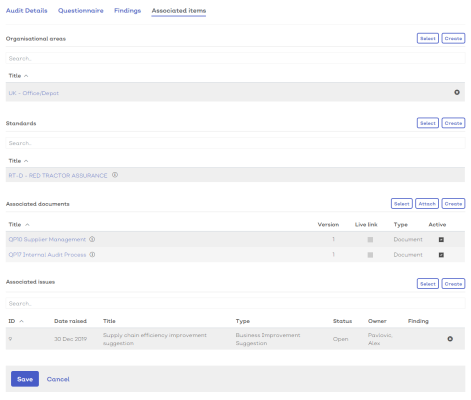
- Select the Associated items tab located at the top of the record. This will reveal the associated items screen displaying any items that have been associated with the overall audit record.
[click image to expand]
-
Associated items are split into different sections for each type of item e.g. Documents, Standards.
- Select an item from the list to view the record details screen in a pop-up panel.
- To return to the audit, simply close the panels using the large close 'X' icon in the top right.
Attach evidence
Attaching evidence to a question allows you to upload photos or documentation from your device, To attach evidence:
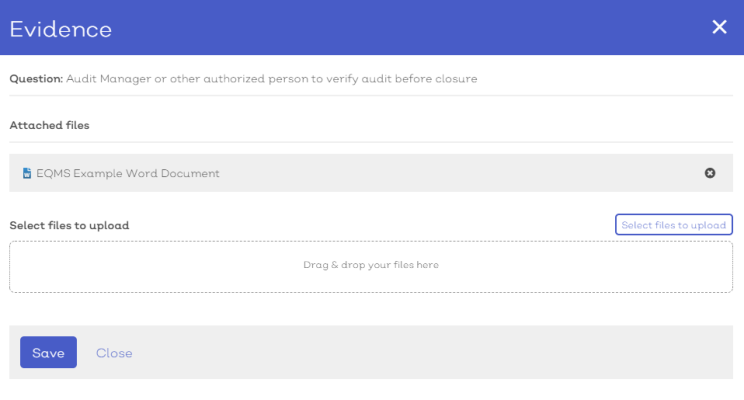
- Select 'Evidence' underneath the question you wish to attach a file to. The Evidence panel will appear, similar to below:
[click image to expand]
- Next, either drag and drop a file (or several in a batch) from your file explorer into the drag and drop area
- OR, select the 'Select files to upload' button to display the file explorer of your device and choose the required file(s)
- Once the file is uploaded and the bar turns green select Save to confirm
- You can view the attached evidence by selecting each record from the 'Attached files' list in the evidence panel.
- To return to the audit, simply close the panel using the large close 'X' icon in the top right.
Raise findings
If, during the process of your audit, you spot a non-conformance, observation, room for improvement or even an example of good practice, you can raise a simple record to begin logging the finding and managing any possible corrective action processes.
To raise a finding against a specific question:
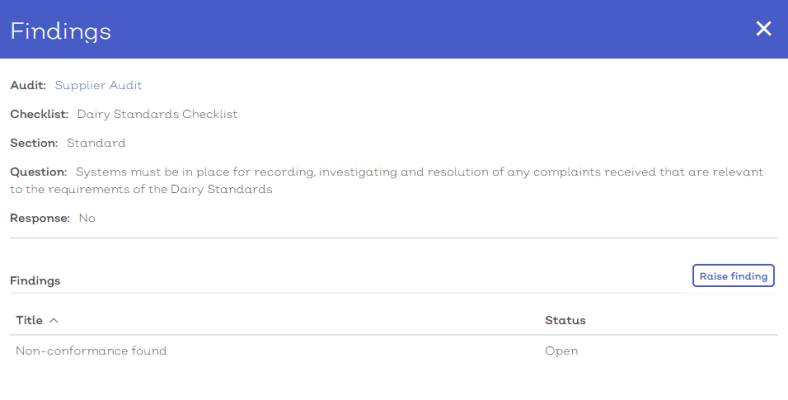
- Select 'Findings' underneath the question you wish to attach a file to. The Findings panel will appear, similar to below:
[click image to expand]
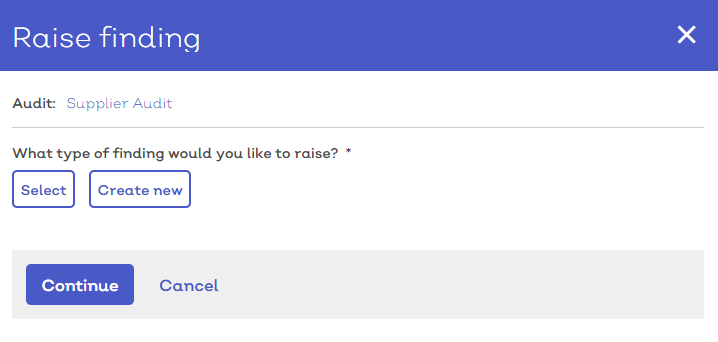
- Select 'Raise finding'. This will reveal the Raise finding panel, similar to the one shown here.
[click image to expand]
- When prompted to answer what type of finding you would like to raise, choose Select. This will reveal the Select finding type list modal.
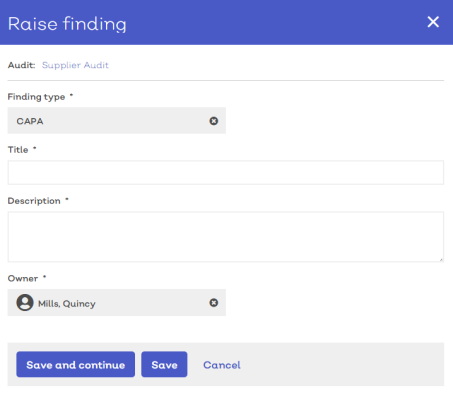
- Tick the box in the row of the type of finding you want to raise then select Confirm. This will reveal the additional fields in the Raise finding panel as shown here:
- Provide a suitable Title and Description
- By default, the owner will be set to the current user, if you wish to change ownership and pass to another user, select the remove icon [
] and then use the 'Select' option to choose another suitable user. They should receive a notification when the finding is raised.
- If you want to save and return to the audit, select 'Save'. The finding record will be raised and associated with the question while the panel will close.
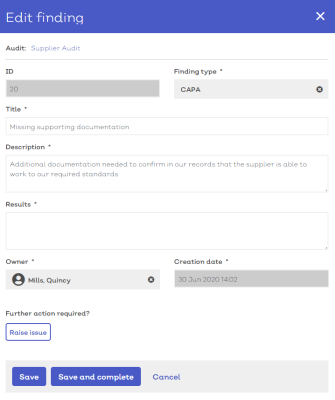
- If you want to save the finding and continue to manage the record, select 'Save and continue'. The panel will refresh and ask if any further actions are required.
[click image to expand]
- From here you can raise an issue record to be able to manage and control the finding. For more information on raising issues, see here.
- Once the issue is raised, it will automatically be associated with the finding and you can go back to progressing the audit.
Note: Raise issues is only available if your system includes the EQMS Issue management module and your account has Issue management permissions.
- For additional information on managing finding records, see here.
Submit your responses
Once all questions have been responded to by all associated auditors, each section header should either read 'Complete' or 'Marked as not applicable'. At this point, you can now submit and complete the audit record.
- To submit, select the 'I'm finished. Submit my responses.' button. At this point the system will validate all of the supplied responses. If any errors are found, warning messages will be displayed against the relevant questions with information about what data may be missing or does not fit the required criteria.
- Validation errors may also occur if any required findings have not been raised.
- Once all, if any, validation errors are corrected you can select the submit my responses button again.
- You may also be prompted to enter your EQMS password to confirm.
Close the audit
When the audit questionnaire has been submitted, the audit status will update to completed and will remain in this state until the record is either manually closed, or all raised findings have been completed (if auto-close is enabled on the audit type).
To manually close the audit:
- First, review that all required information has been provided and any raised findings have been resolved.
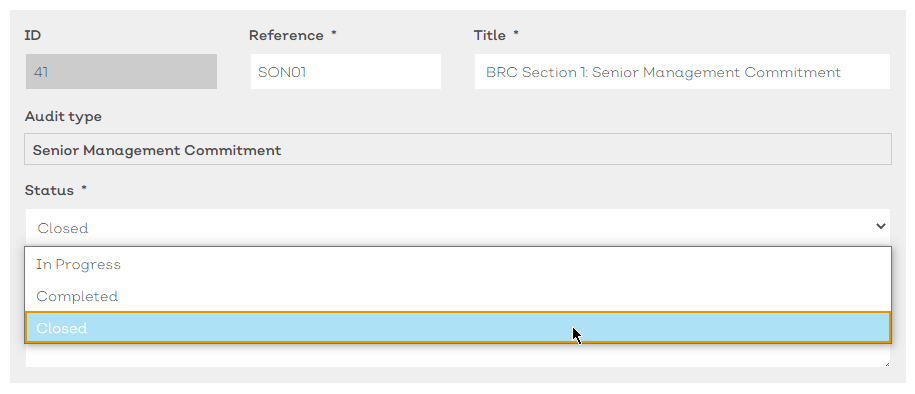
- Once confirmed, select 'Closed' from the audit status field in the main Audit details tab as shown here:
[click image to expand]
- Select Save to confirm.
- You may be prompted to enter your EQMS password)
- If the record passes validation, it will be closed and become read only.
