Checklists
Audience: Audit administrators, Audit Managers with Checklist permissions
Checklists are templates useed to group together and sequence your individual questions, ready to be associated with an audit. You can restrict which groups of auditors are permitted to be assigned to a specific checklist. For example, you may want to ensure that only members of your Quality Team are permitted to carry out the final review and sign off checklist for your Quality inspections.
Checklists list
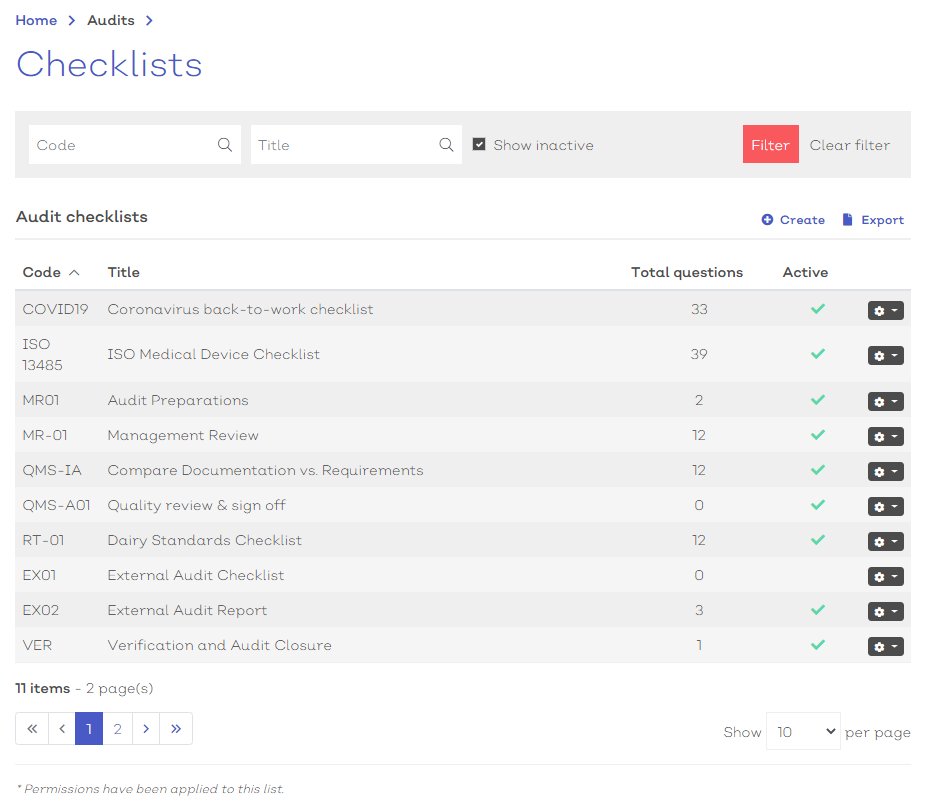
- To view, create and edit checklists, navigate to Home > Audits > Checklists. You should be presented with a screen similar to below:
[click image to expand]
- Select any option from the list to view the details.
- Standard list screen filters and Export available.
- 'Show inactive' will include any records currently marked as inactive in the list results.
Selecting the options icon [![]() ] at the end of each row will reveal how you can interact with the record.
] at the end of each row will reveal how you can interact with the record.
For checklists, the options are**:
| Option | Description |
|---|---|
| View | Select to view the details screen |
| Edit | Select to enter the checklist details edit screen |
| Copy | Select to use the checklist as a template for a new checklist |
**Permissions apply
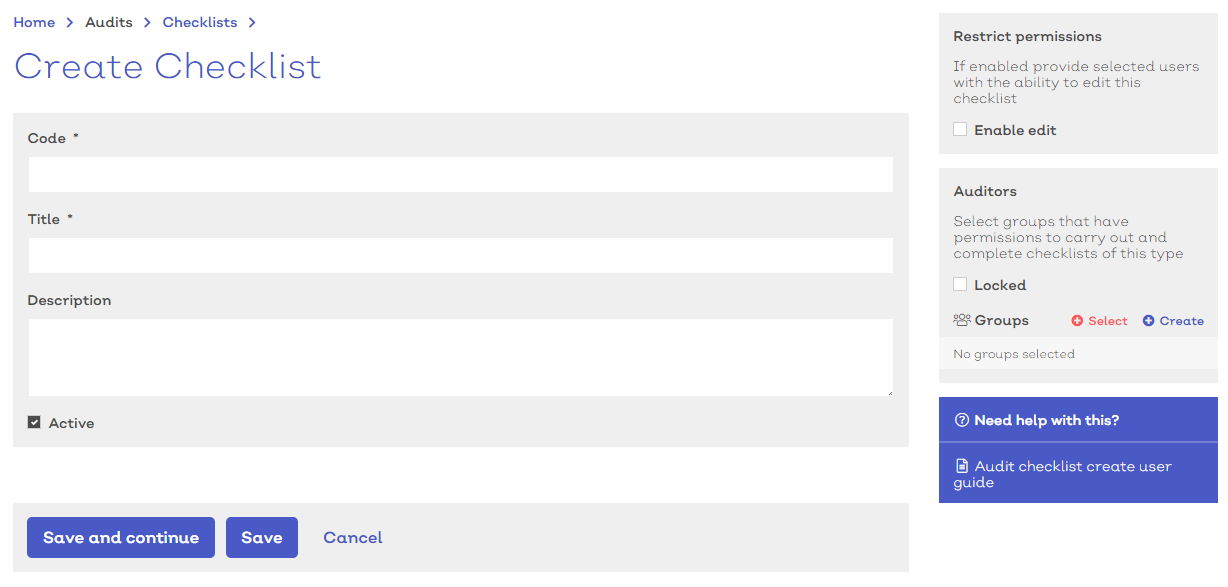
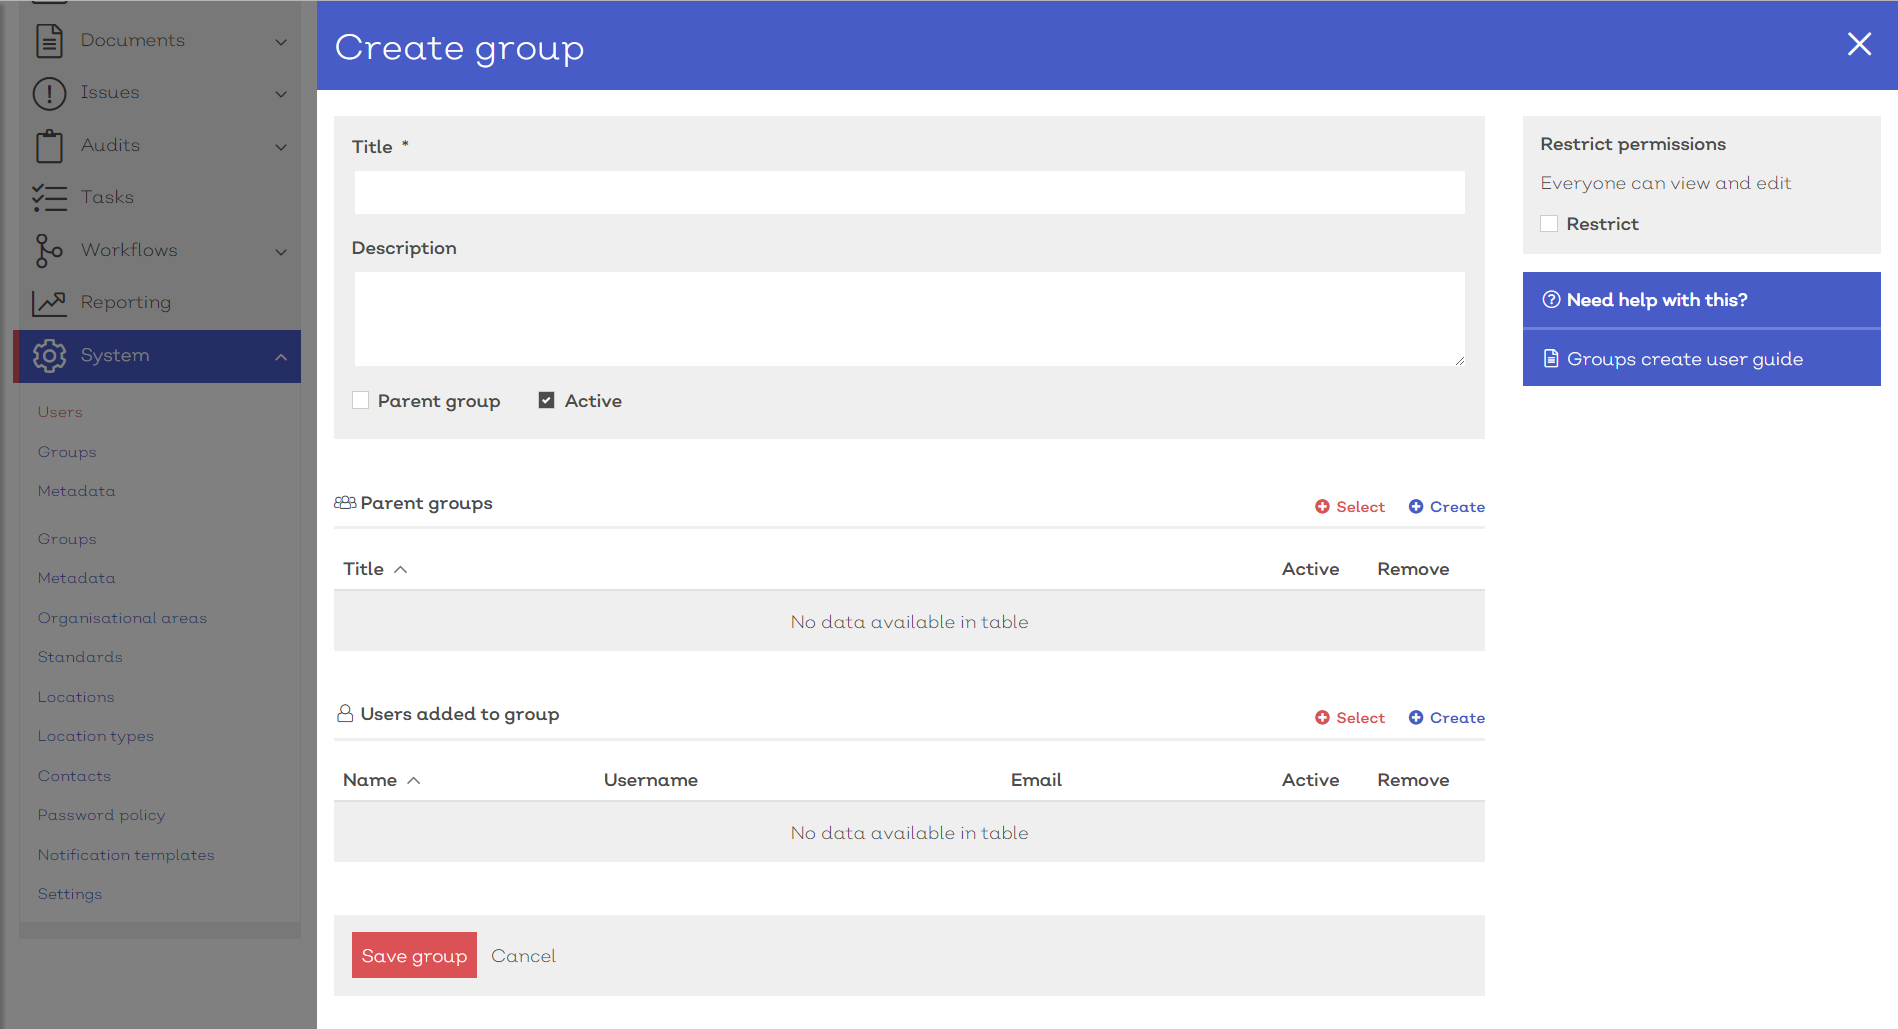
Create a new checklist
To create a new Checklist:
- Navigate to Home > Audits > Checklist.
-
Select
 Create. You should be presented with a screen similar to below:
[click image to expand]
- Provide a suitable code and title for the checklist.
Note: A unique combination of code and title is required for each checklist.
- Down the right hand side of the screen are options for defining the default auditors and restricting access to the checklist template.
- Select Save to confirm the creation of your new checklist
- Or, select Save and continue to create the new checklist and begin adding questions and associating items..
Note: If you make any further changes, add questions or assocaited items, be sure to select Save again to confirm.
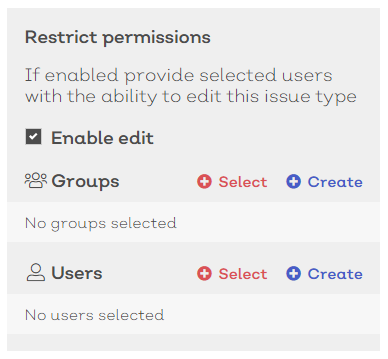
Checklists can be restricted so that only users within a defined group can view, edit or manage. You can define the checklist permissions down the right hand side column of the details screen, similar to below:
[click image to expand]
To allow specific groups or users to edit the checklist
- Tick the Enable edit check box in the Restrict permissions box in the right hand side column of the screen.
- Select
 Select in the Groups or Users section. This will present you with a Select group or user modal similar to below:
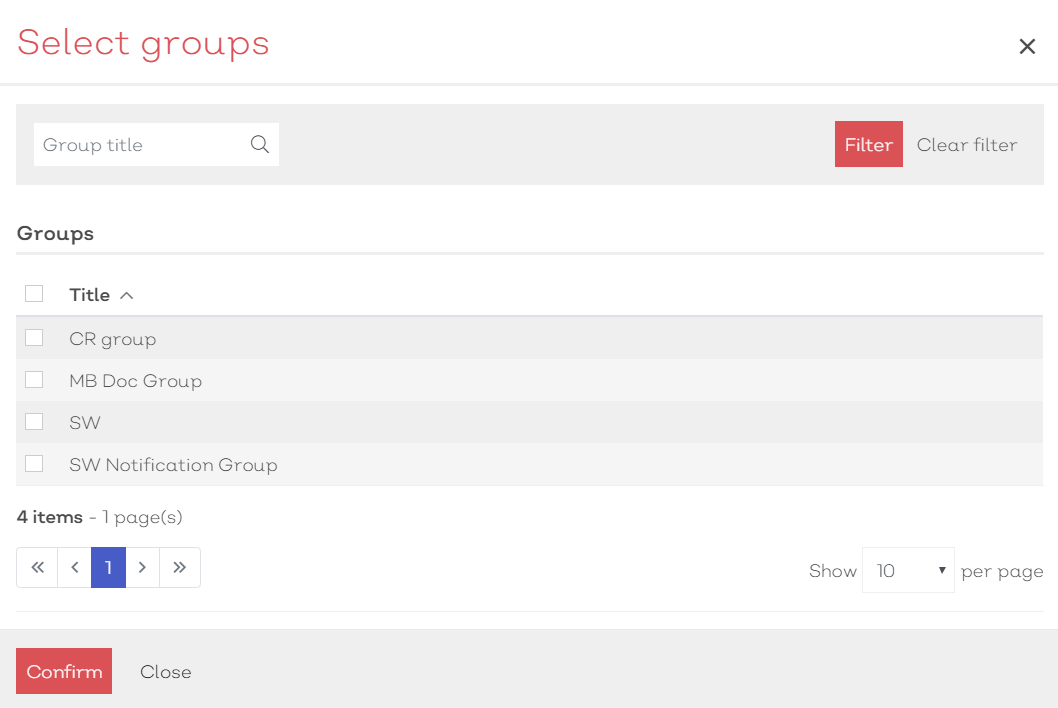
[click image to expand]
-
Use the Select group/user modal to find the required group(s)/user(s)
-
Once located, check the box in the far left of the suitable row(s)
-
Select confirm to associate the group(s)/user(s) to the checklist
Note:
Any user or group given permission here must also have at least Audit User level permissions granted by a System Administrator to be able to access Audit records.
- Select Create. A create new group/user panel will slide into view, similar to below:
[click image to expand]
- Follow the instructions:
- here to create the new group.
Note:
Permissions apply. If you do not have permission to create new groups or users, the ![]() Create option will not be available to you
Create option will not be available to you
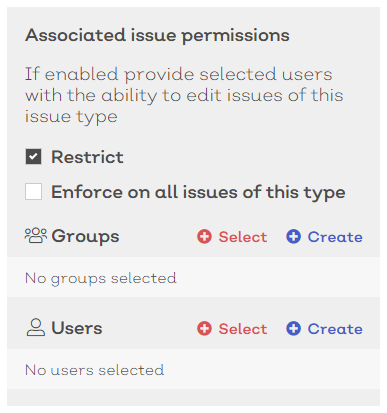
The auditors section is where you can restrict which groups of users are able to be assigned to complete checklists within an audit record.
[click image to expand]
To restrict the checklists using this template:
- To enforce these settings across ALL checklists of this type, tick the Locked check box
- Select Select. This will present you with a Select group/user modal similar to below:
[click image to expand]
-
Use the Select group/user modal to find the required group(s)/user(s)
-
Once located, check the box in the far left of the suitable row(s)
-
Select confirm to associate the group(s)/user(s) to the checklist
- Select Create. A create new group/user panel will slide into view, similar to below:
[click image to expand]
Note:
Permissions apply. If you do not have permission to create new groups or users, the ![]() Create option will not be available to you
Create option will not be available to you
Once the checklist record has been created you can begin to associate all of the questions you want to include.
To add questions, select the Questions tab at the top of the Edit checklist details screen.
By default, the checklist will include a single section for you to add questions to.
To rename a section:
- Simply click on the section title field and enter a new title.
To add a new section:
- select the 'Add section' button towards the bottom of the screen.
To add a new question to the checklist:
- Select the 'Select' button in the questions section header. This will present you with the Select questions modal, similar to below:
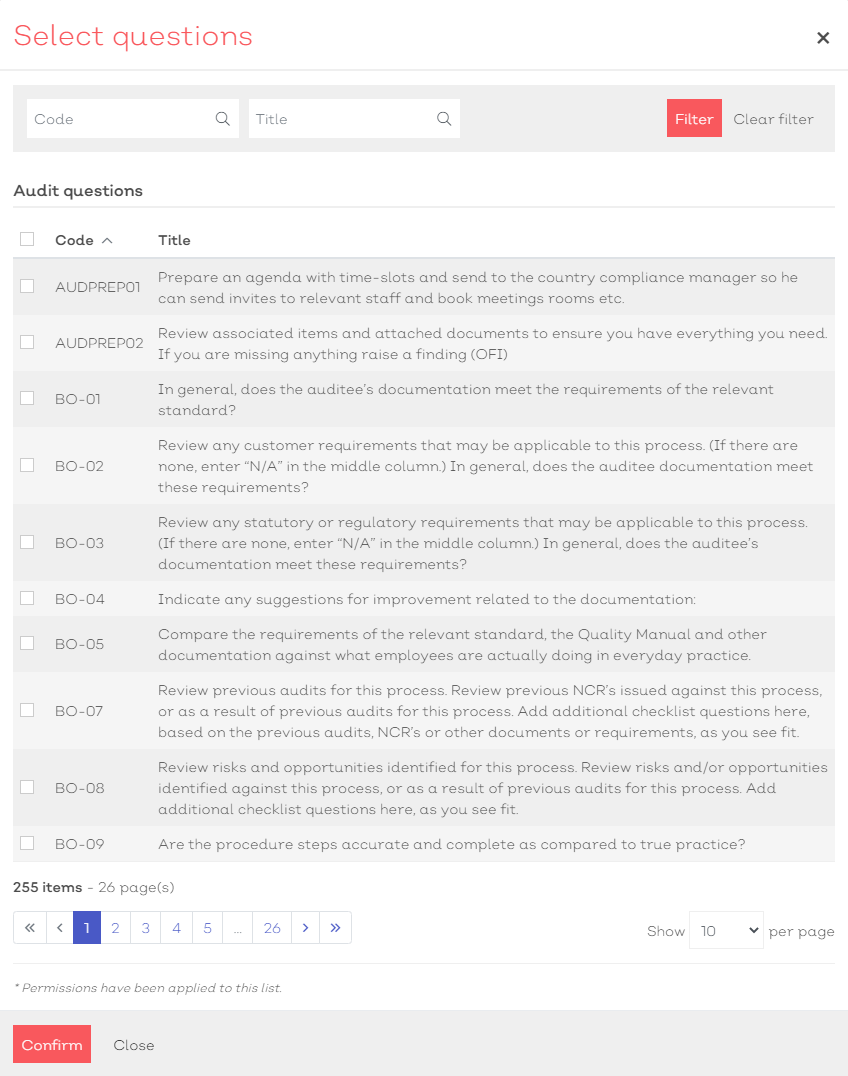
[click image to expand]
-
Use the Select questions modal to find the required field(s)
-
Once located, check the box in the far left of the suitable row(s)
-
Select confirm to associate the questions to the checklist
- Select 'Create'. A create new question panel will slide into view, similar to below:
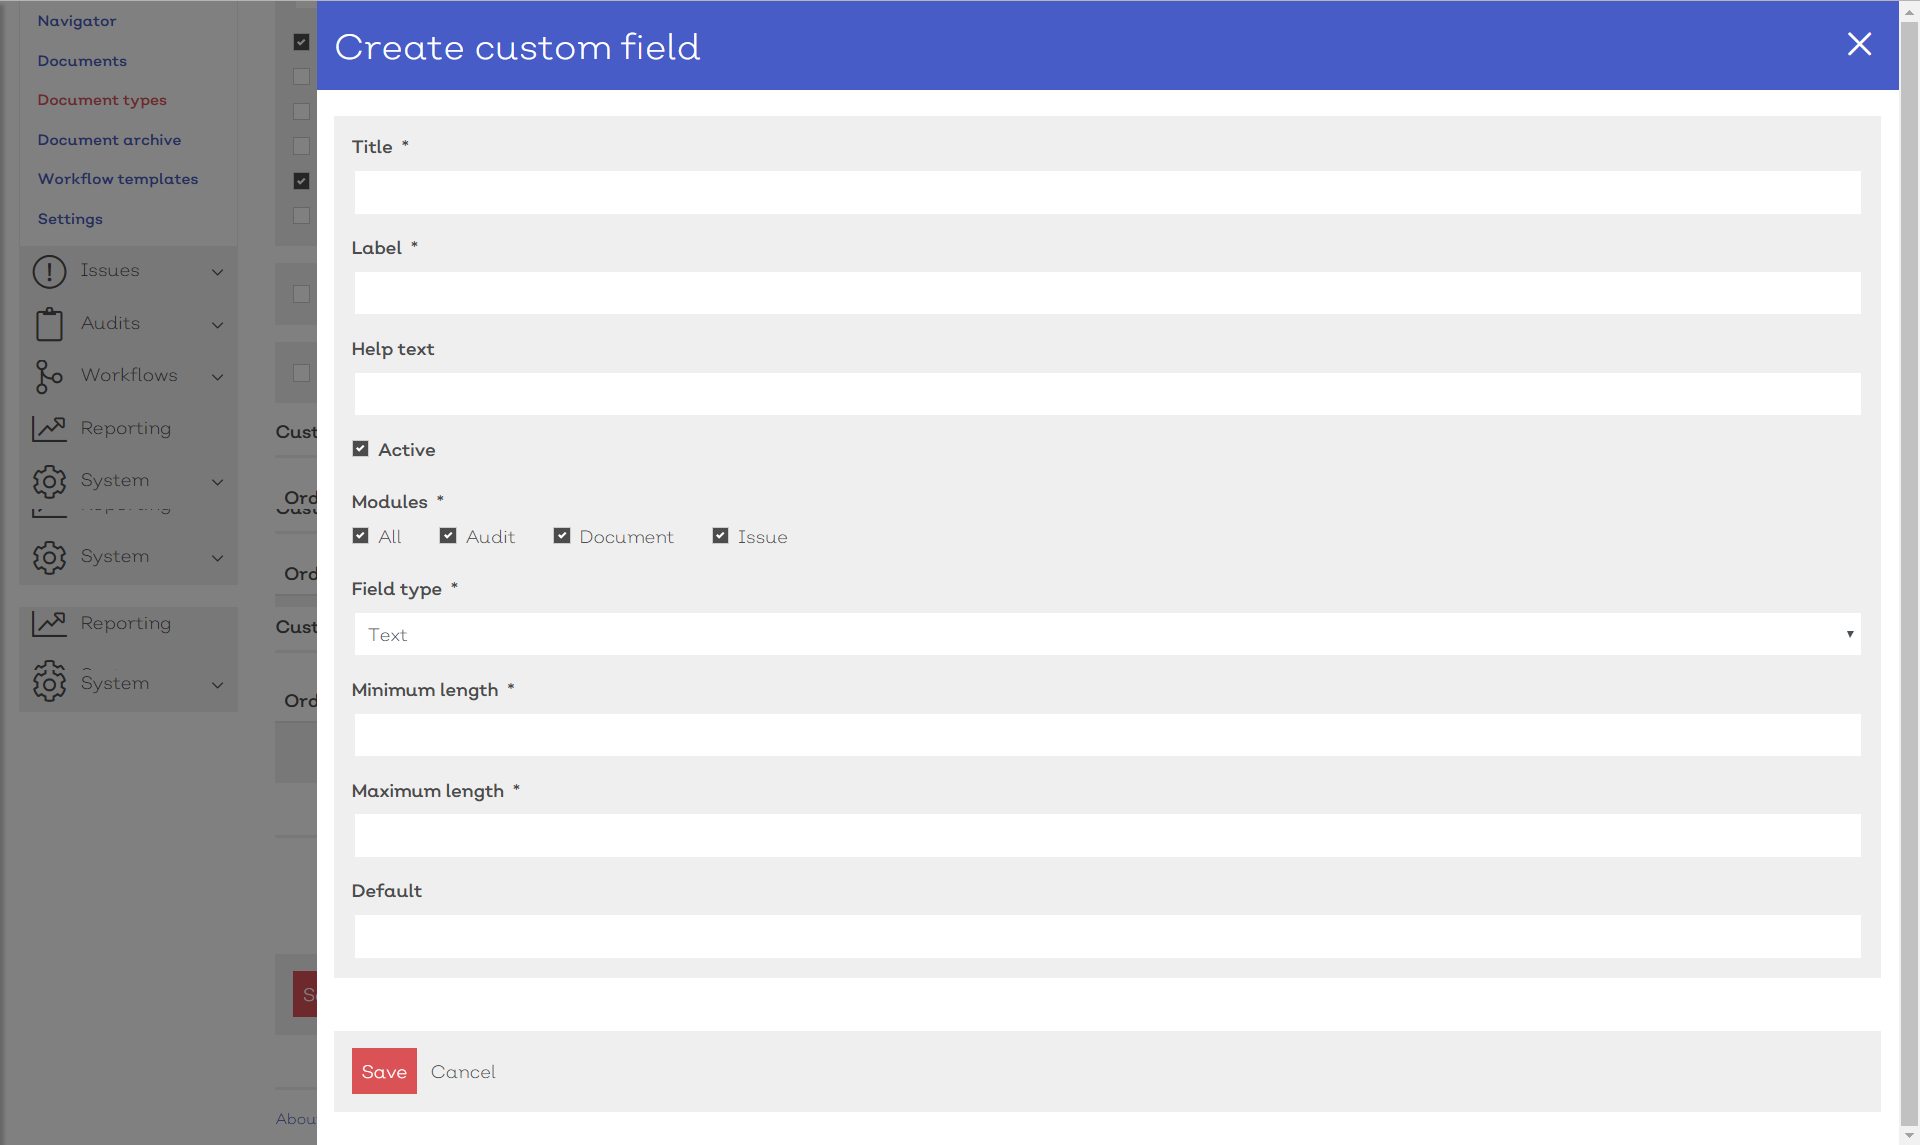
[click image to expand]
- Follow the instructions here to create the new question
Note:
Permissions apply. If you do not have permission to create new questions, the 'Create' option will not be available to you
View checklist
Viewing the checklist record you a read-only view of the permitted details.
To access the checklist details screen:
- Navigate to Home > Audits > Checklist and either:
- Select view from the more options button [
 ]in the list screen
 - If you have read-only access to a checklist you can simply select the type from the list
- Select view from the more options button [
You should be greeted with a screen similar to below:
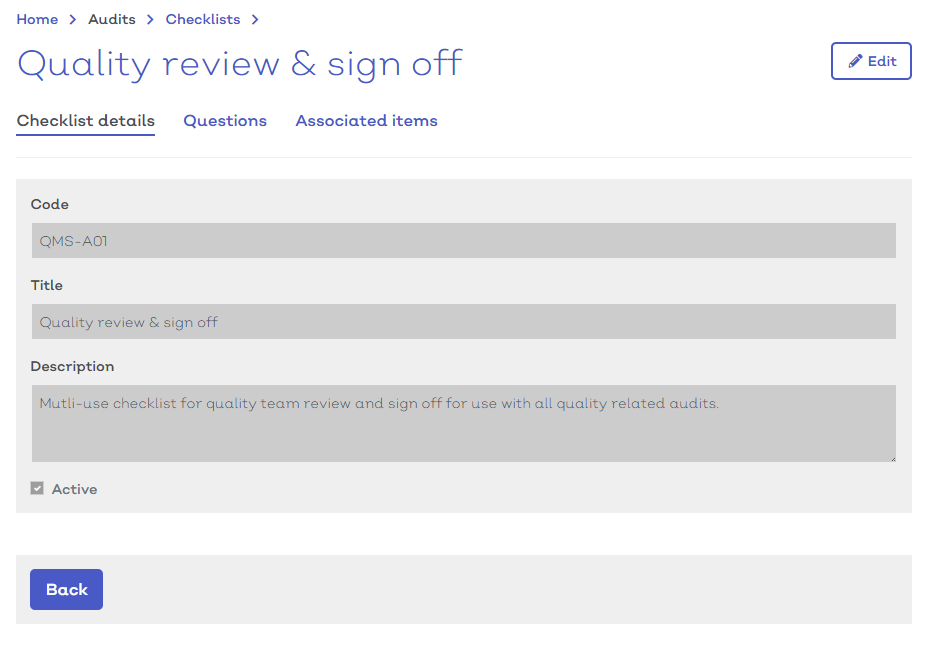
[click image to expand]
The details screen will list all key details to do with the checklist including questions, associated items and permissions..
Note:
- The details screen is read only and all fields should be greyed out.
- Select the edit icon in the top right to access the edit details screen
If you have the correct permissions the following option will be available to you in the top right:
| Icon | Title | Description |
|---|---|---|
| Edit | Allows you to access the edit details screen |
.
Edit existing checklists
To edit an existing checklist:
- Navigate to Home > Audits > Checklists.
- Either:
- Select a checklist from the list to view the edit screen
- Select Edit from the options icon [
 ] in the relevant row
- For more information on audit details, see above
- To remove any information, select the delete icon next to the relevant data in the details screen
Copy checklists
EQMS allows you to copy an existing checklist to use as a base template for a new checklist. This reduces the time required when creating multiple similar checklists.
To copy an existing checklist:
- Navigate to Home > Audits > Checklists.
- Either:
- Select a checklist from the list to view the edit screen and select Copy from the more options icon [
 ]
] - Select Copy from the options icon [] in the relevant row in the list screen
- Select a checklist from the list to view the edit screen and select Copy from the more options icon [
This will reveal a new checklist details screen with all core details from the copied checklist contained within including any associated questions and permissions groups.
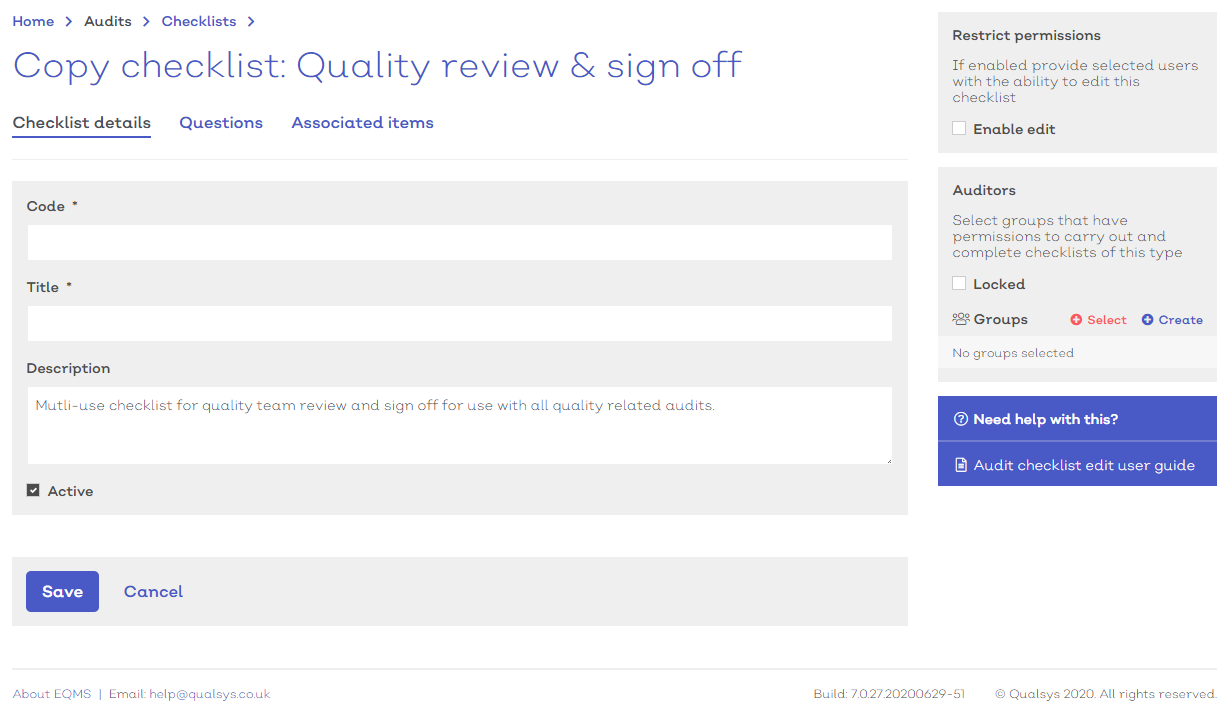
[click image to expand]
- Complete the details for the new checklists by amending any of the existing fields. For more information on creating a new checklist, see above